



A protein–ligand simulation can stall before the first dynamics step for a surprisingly small reason: the ligand in the structure and the ligand described by its topology do not match. Atom names, hydrogens, residue names, or force-field choices can differ. The result is a setup problem that is easy to overlook when the protein itself appears ready.
This guide focuses on the handoff between ligand parametrization and GROMACS Wizard preparation. It applies to non-covalently linked protein–ligand complexes. Covalent complexes need additional treatment for the linking bond and are outside this workflow.
1. Start with a compatible parametrization route
Choose the ligand parametrization tool based on the force field you intend to use for the system. The documentation lists examples: Antechamber for AMBER, ATB for GROMOS96 54A7, CGenFF for CHARMM, and LigParGen for OPLS-AA. Check the tool’s accepted input formats before exporting the ligand; converting files later is possible, but it is easier to plan the handoff first.
Many parametrization tools require hydrogens to be present. In SAMSON, you can add them through Edit > Add hydrogens. For ligands in the Chemical Component Dictionary (CCD), SAMSON can use the CCD hydrogen names. For ligands not in the CCD, hydrogen placement is based on valences, so aromatic rings and charges should already be specified. If your ligand file contains that information, such as a .mol2 file, use it as the starting point for adding hydrogens.
2. Keep the structure and topology in agreement
If the ligand is inside a protein–ligand structure, select it in the Document view and use Home > File > Save selection as… to export it in a format accepted by the chosen parametrization workflow. If you already have a ligand file with hydrogens, you can use that directly.
After parametrization, check whether the server provides an updated structure. Comparing it with the original helps reveal changes such as renamed atoms or added hydrogens. This comparison matters because the ligand represented in the structure must correspond to the ligand represented in the topology. In particular, the ligand name in the structure file must match the name used in the topology data.
If the ligand has changed, update the complex accordingly. You can position the updated ligand where the original was and then delete the old ligand. If you are building the complex from separate files, you can place the ligand manually, dock it with AutoDock Vina Extended, or append it to the protein structure file. When appending, ensure the structures do not overlap and use separate chains or consecutive sequence numbering.
3. Gather the files before opening Prepare
At the end of parametrization, the key deliverable is usually an include topology file, .itp. Some workflows also provide an updated structure and, in some cases, a force field that has been modified for the parametrization. Keep these outputs together and note which force field was used. For example, ATB may provide gromos54a7_atb.
This simple file check can prevent a confusing interruption later:
- Is the ligand structure the one that corresponds to the parametrized ligand?
- Are the expected hydrogens present?
- Does the ligand name match between the structure and the
.itpfile? - Do you have the required force field if it is not available by default?
4. Add the ligand topology in GROMACS Wizard
Open GROMACS Wizard in SAMSON via Home > Apps > Biology > GROMACS Wizard, select the protein–ligand system in the Document view, and click Set system in the Prepare tab.

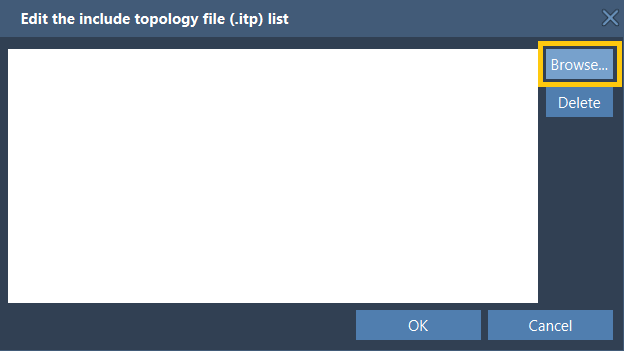
In the Choose model section, use Edit for include topology files (itp), then browse to the ligand’s .itp file. If the parametrization uses a custom force field that GROMACS Wizard does not provide by default, download that force field from the server and add it using the force-field Add button. You only need to add a custom force field once; the Wizard stores it for later use.
5. Prepare, then continue the workflow
Complete the other preparation choices, including solvent model, periodic boundary box, and ions, following the general GROMACS Wizard preparation workflow. Click Prepare to run the step. If a message or warning appears, read it; the documentation notes that warnings may occur, for example when using the gromos54a7 force field from ATB. Use the Wizard’s Output button to inspect the log when you need more context.
Once preparation succeeds, the resulting system is saved in the results folder. You can optionally load it in SAMSON to inspect it before moving on to energy minimization, NVT equilibration, NPT equilibration, and production molecular dynamics.
The main lesson is to treat ligand setup as a consistency check, not just a file upload: select a force-field-compatible parametrization route, compare any updated ligand structure, match the ligand names, and provide the required topology and force field together.
Read the complete protein–ligand systems tutorial for the full workflow and related preparation guidance.
Note: SAMSON and all SAMSON Extensions are free for non-commercial use. Get SAMSON.