



Building a carbon nanotube model can be harder than it first appears: you need to set its direction and length, choose its structure, and—if you need multiple walls—make the tubes concentric. A small mismatch in setup can make it tedious to compare models or assemble a planned structure.
SAMSON’s Nanotube Creator offers two ways to create a tube: a quick mouse-driven workflow in the viewport and a graphical interface for entering parameters directly. The key distinction is convenience versus precise control. Knowing when to use each can make the modeling process clearer and easier to repeat.
Use the viewport to explore
For an initial, interactive build, activate Nanotube Creator from the viewport’s left-side menu under Materials, or open Find everything… with Shift + E and search for the editor. Only one editor can be active at a time.
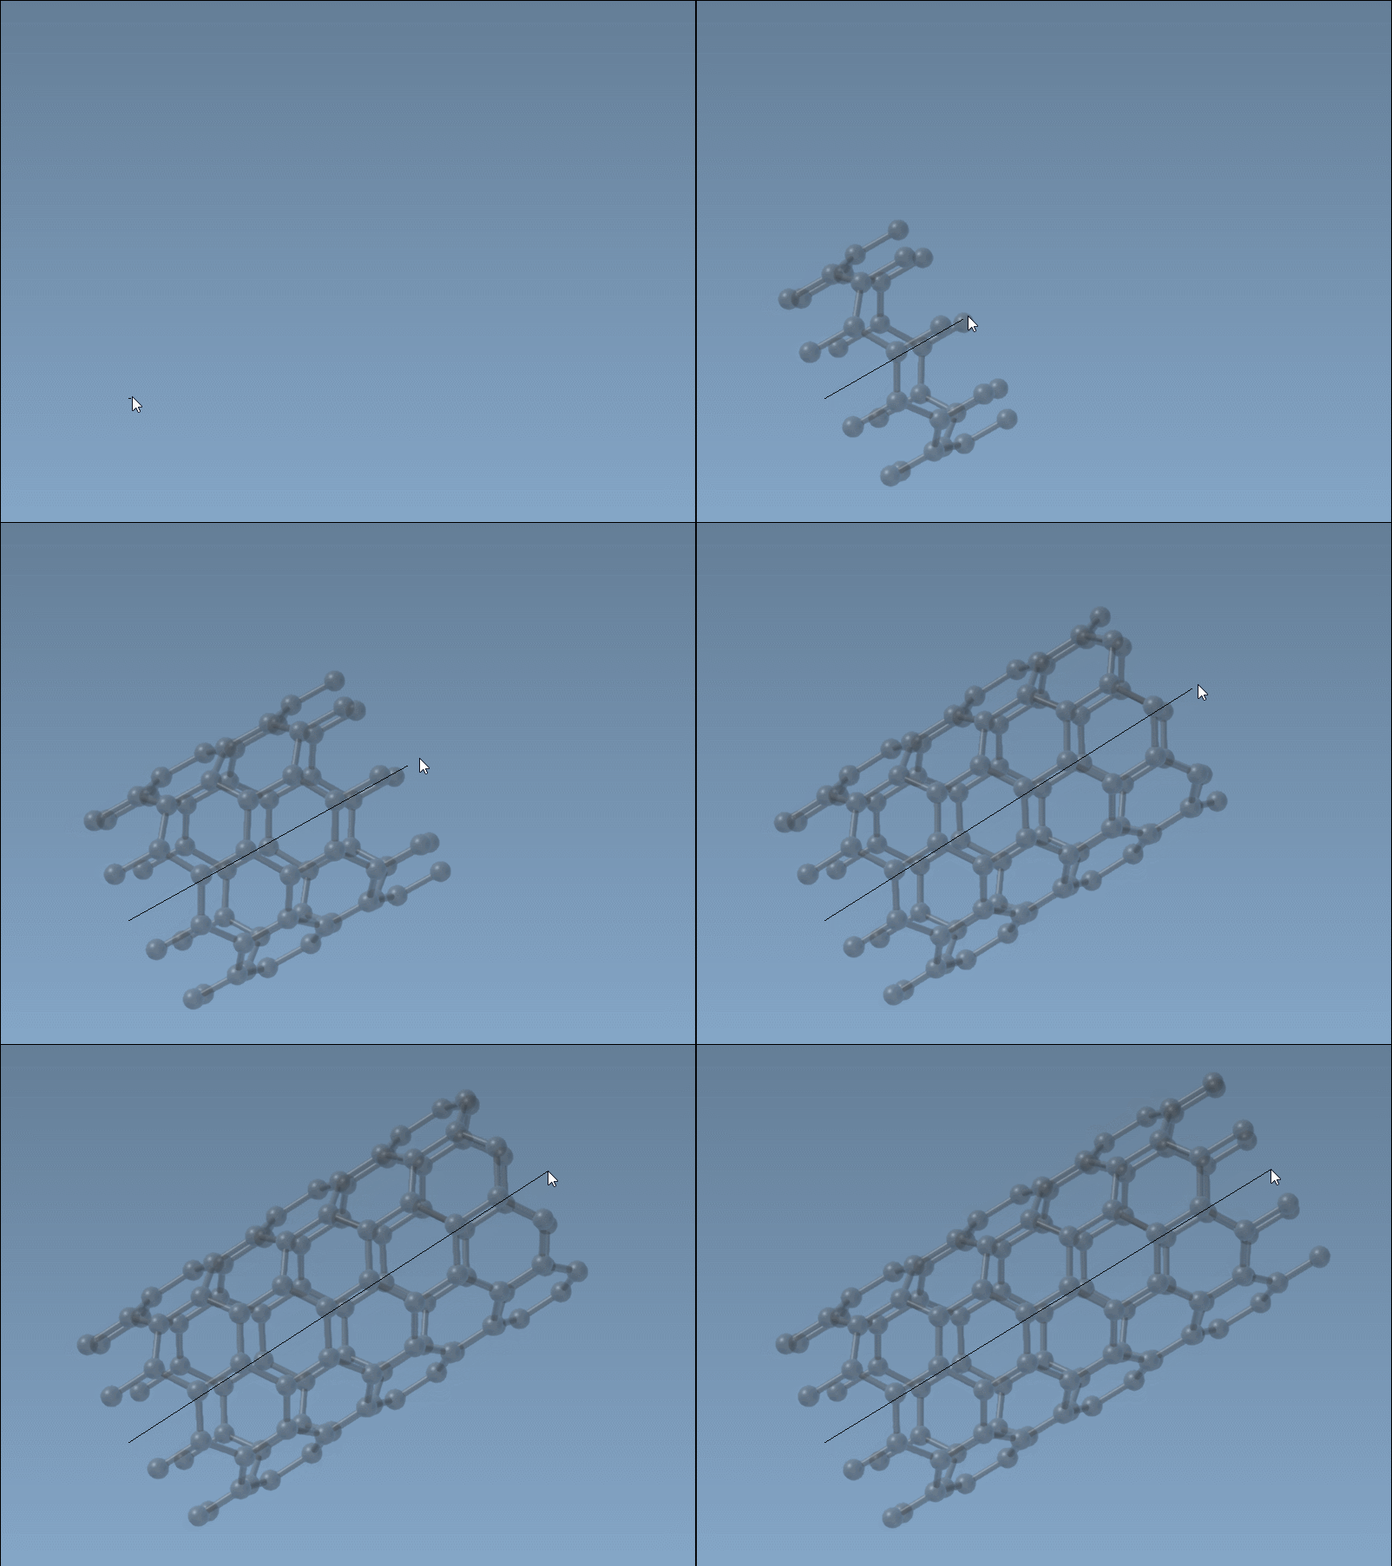
The viewport workflow has two stages. First, press and drag the left mouse button to define the nanotube axis and length. Then release the button, move the mouse to adjust the radius, and click again to confirm. The status bar provides live feedback on the axis orientation, length, and the n and m parameters.
This makes the interactive mode useful when you want to explore a shape or orient a tube visually. Keep an eye on the status bar if you need particular parameter values; it helps turn a visual gesture into a more deliberate choice.
Use the GUI when the geometry needs to be explicit
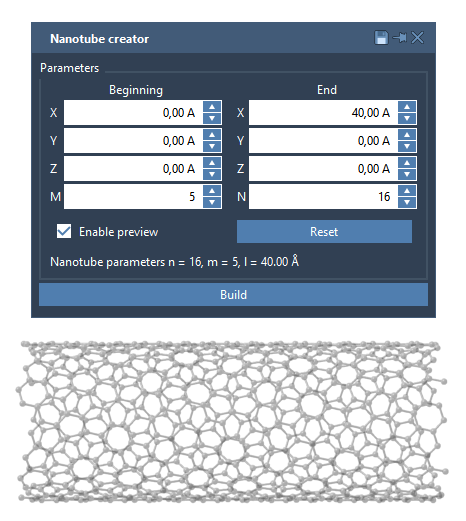
When you already know the positions and parameters you want, open the editor’s graphical interface. If it is hidden, reselect the editor to show it. The GUI lets you set start and end positions in 3D space and enter n and m values before clicking Build.
The positions define the tube’s axis and extent. The n and m values define its chiral vector, which determines its structure and radius. In other words, the axis and length describe where the model goes, while the chiral indices describe what kind of tube is built. Keeping these choices separate is helpful when you are setting up a model deliberately rather than estimating everything by eye.
A repeatable example: three concentric tubes
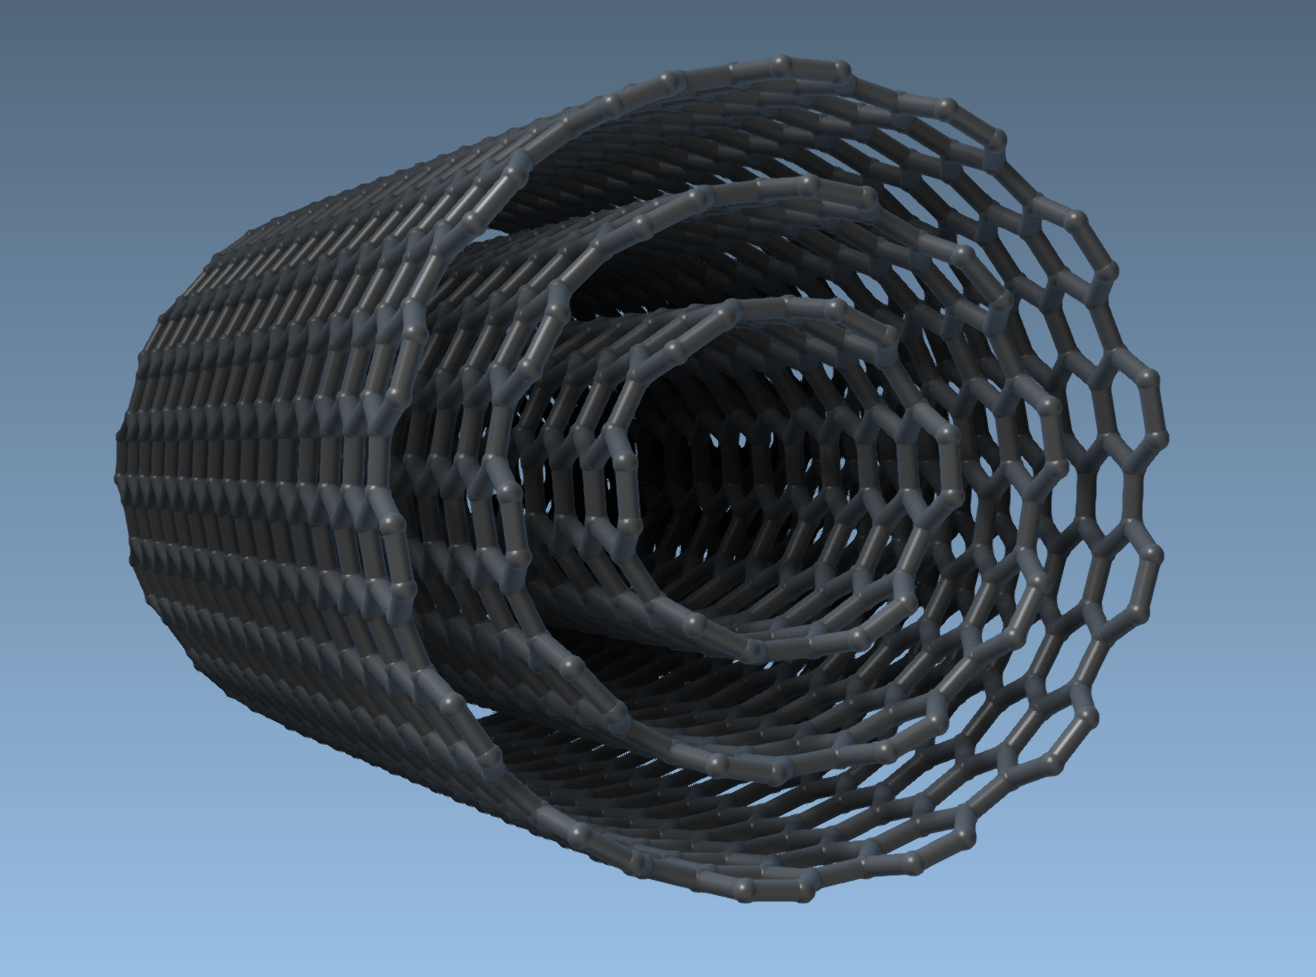
To create a simple multi-walled example, use the same start and end positions for each tube: (0, 0, 0) and (40, 0, 0). This defines a 40 Å length along the x-axis. Then build each tube in turn:
- Set
n = 6andm = 6, then click Build. - Keep the same start and end positions, set
n = 10andm = 10, then click Build. - Keep the positions again, set
n = 14andm = 14, then click Build.
Reusing the same axis coordinates is the important practical step: it places the tubes along the same direction and length, while the different parameter pairs produce the nested model. The resulting example is shown below.
Choose the workflow that fits the task
Use the viewport when you are exploring orientation and size interactively. Use the GUI when you want to specify exact positions and chiral indices, or build a multi-walled model by repeating a known setup. In either case, check the displayed parameters before you commit to a model if those values matter to your work.
Once the nanotube is built, you can create images using the visualization guide, or continue to the example on building and modeling a carbon nanopore. For the full walkthrough, see the original carbon nanotube modeling tutorial.
Note: SAMSON and all SAMSON Extensions are free for non-commercial use. Get SAMSON.