



Putting a protein into a membrane model can be surprisingly fiddly. You need lipids around the protein, but a box that is too small may not leave enough room, and simply filling the whole region can place molecules where the protein already is. A useful first step is to treat this as a geometric packing task: orient the protein, define the space for one lipid layer, and tell the builder to account for the molecules already present.
SAMSON’s Molecular Box Builder can place repeated copies of a selected molecule inside a 3D box. The workflow below uses that capability to build a single lipid layer around a protein. It creates an initial arrangement; it does not replace later preparation, minimization, or equilibration for a molecular simulation.
1. Orient the protein before defining the box
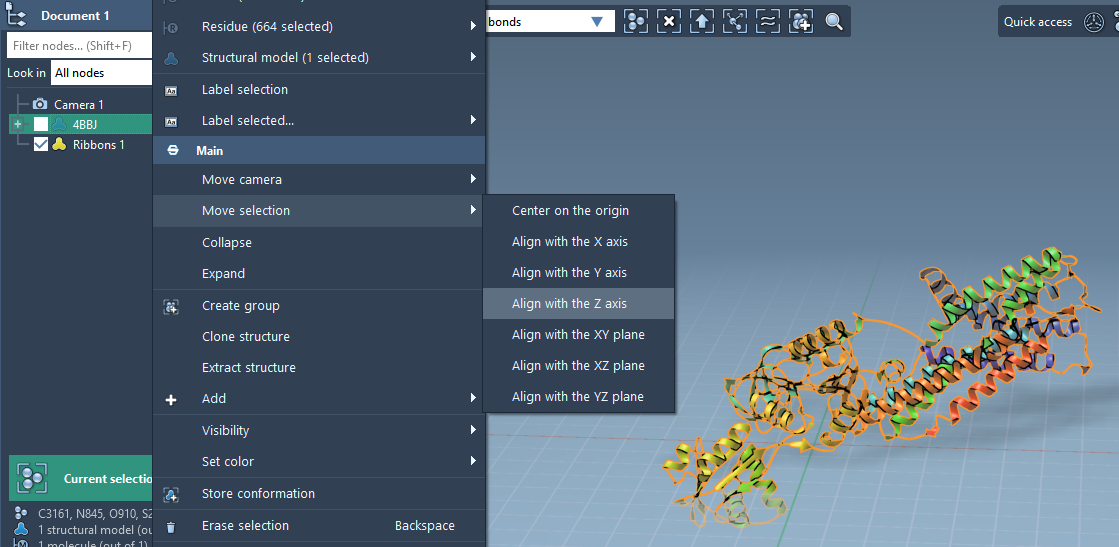
Start by importing the protein structure. In Document view, right-click the protein and choose Move selection > Align with Z axis, then choose Move selection > Center on the origin. This establishes a convenient orientation and reference point before you place the lipid layer.
Why do this first? The box dimensions and center are easier to reason about when the protein has a consistent orientation. Centering it also gives you a straightforward starting point for centering the box around the protein. The orientation is a modeling choice, though: check the result visually before proceeding.
2. Set the lipid and its orientation
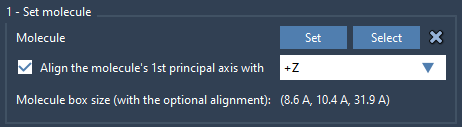
Import the lipid molecule you want to replicate, select it in the Document view or Viewport, and click Set in Molecular Box Builder. For this example, align the lipid’s first principal axis with +Z. The app calculates the molecule’s bounding box using the selected alignment, so changing orientation can affect the predicted packing.
If you are new to the app, the essential distinction is that the selected molecule is the template: the builder uses copies of that molecule to populate the box. Use the app’s Select control to highlight the currently set structure, or X to clear it if you need to choose another one.
3. Define the region for the layer
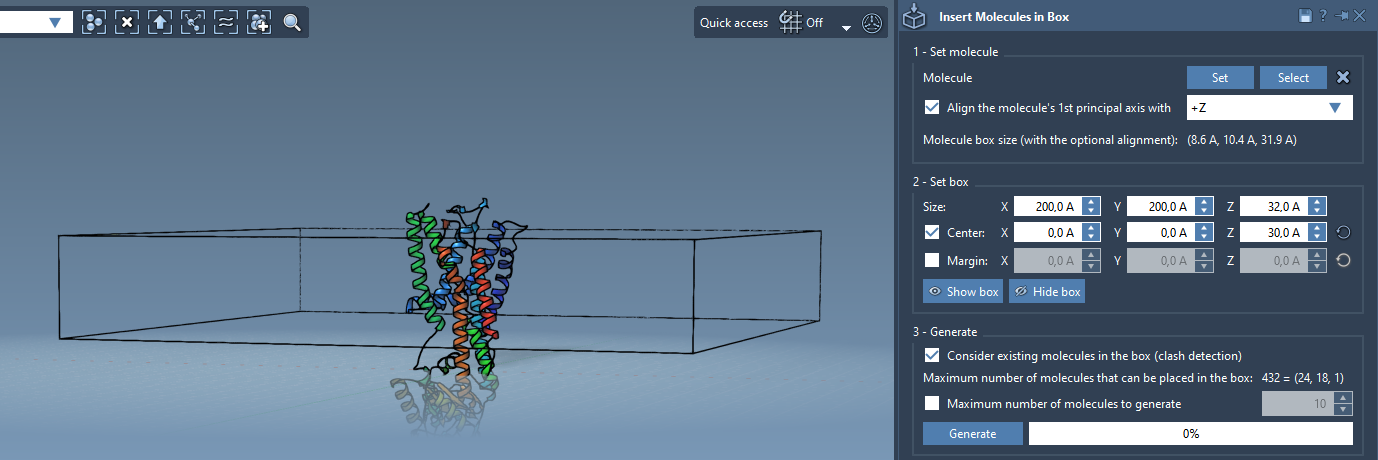
Set the box dimensions along X, Y, and Z, then center the box around the protein. Adjust the dimensions so the box covers the region where you want a single lipid layer. The box is a placement region, so its size and position influence where copies can be generated.
You can also set a margin between inserted molecules. The default is intended to avoid clashes between the generated copies; changing the margin changes how closely they can be packed. Molecular Box Builder updates its estimate of how many molecules fit when you adjust the box size or margin. Treat that estimate as a planning aid: inspect the generated structure afterward rather than assuming the predicted count alone guarantees a suitable model.
4. Keep generated lipids out of occupied space
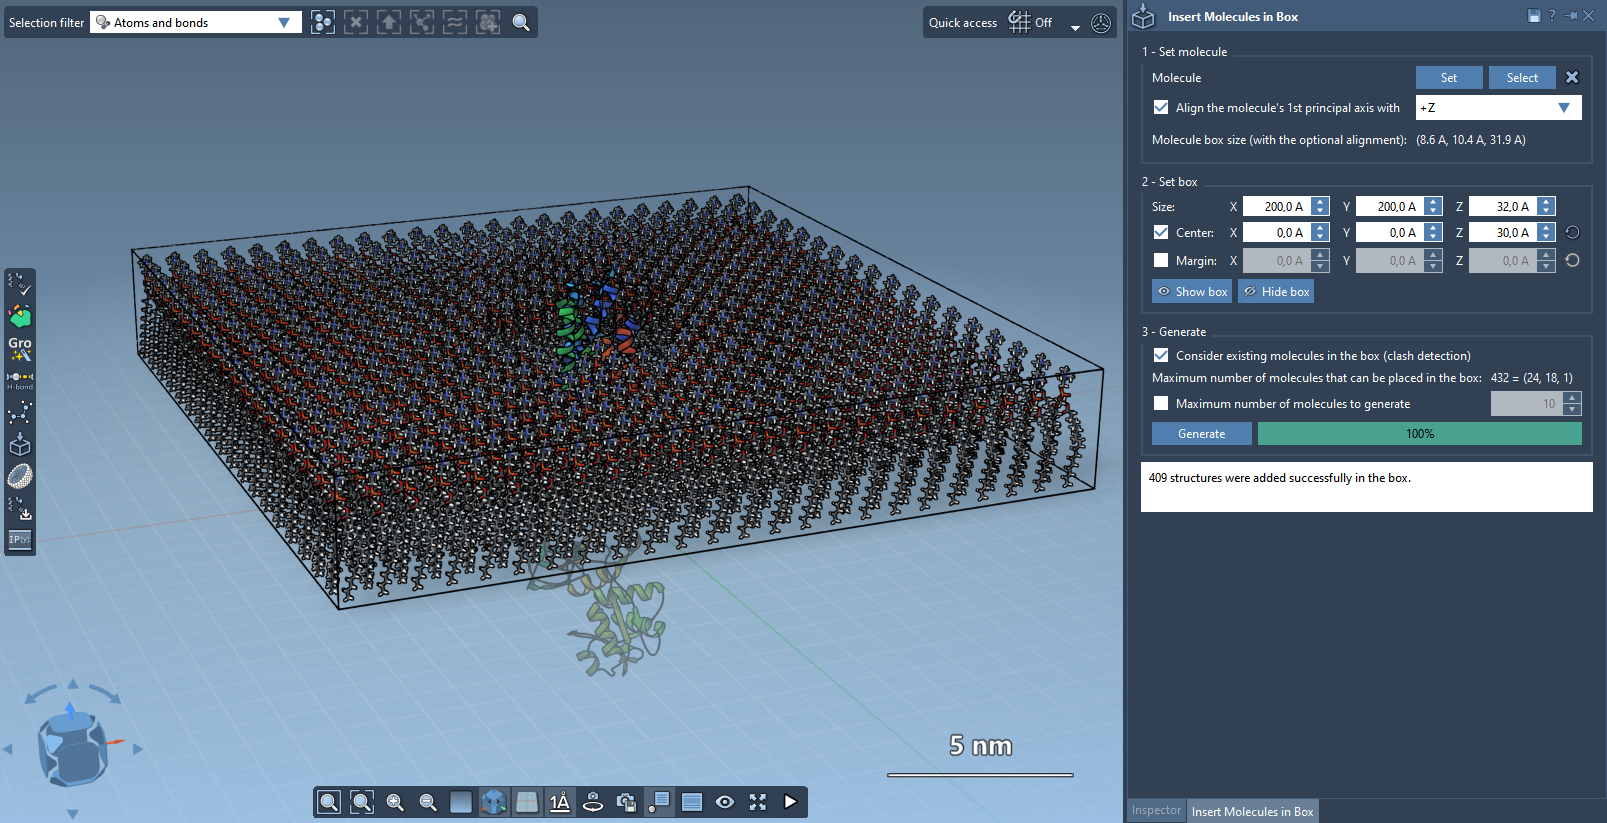
Before generating the layer, enable Consider existing molecules in the box. This tells the builder to place lipids only in available space, taking the protein already in the box into account. Then click Generate. The result should be a layer of lipid copies around the protein rather than a box filled without regard to the existing structure.
Want a bilayer instead?
A bilayer can be built as two separate layers: generate the first with the lipid aligned to +Z, shift the box center in the Z direction, and generate the second with the lipid aligned to -Z. This gives you control over the placement and orientation of each layer. Check the resulting arrangement visually, and remember that a generated structure may need further preparation before simulation.
For simulation workflows, the SAMSON documentation points to GROMACS Wizard for preparing, minimizing, equilibrating, and simulating a generated system. Read the full Molecular Box Builder tutorial for the complete workflow and additional examples.
Note: SAMSON and all SAMSON Extensions are free for non-commercial use. Get SAMSON.