



A familiar challenge in molecular design is deciding where to change a molecule. You may have a promising scaffold, but testing substitutions manually—one structure at a time—can make it tedious to compare positions and keep the resulting structures organized. Positional analogue scanning offers a focused way to generate a set of related candidates: define a substructure, then replace it or attach a group at each matching position.
In SAMSON, the SMILES Manager can generate these analogues from a starting molecule and a SMARTS pattern. The useful idea is to make the structural change explicit and repeatable, so you can inspect a small series rather than rebuild every candidate from scratch.
Start with a molecule you can recognize
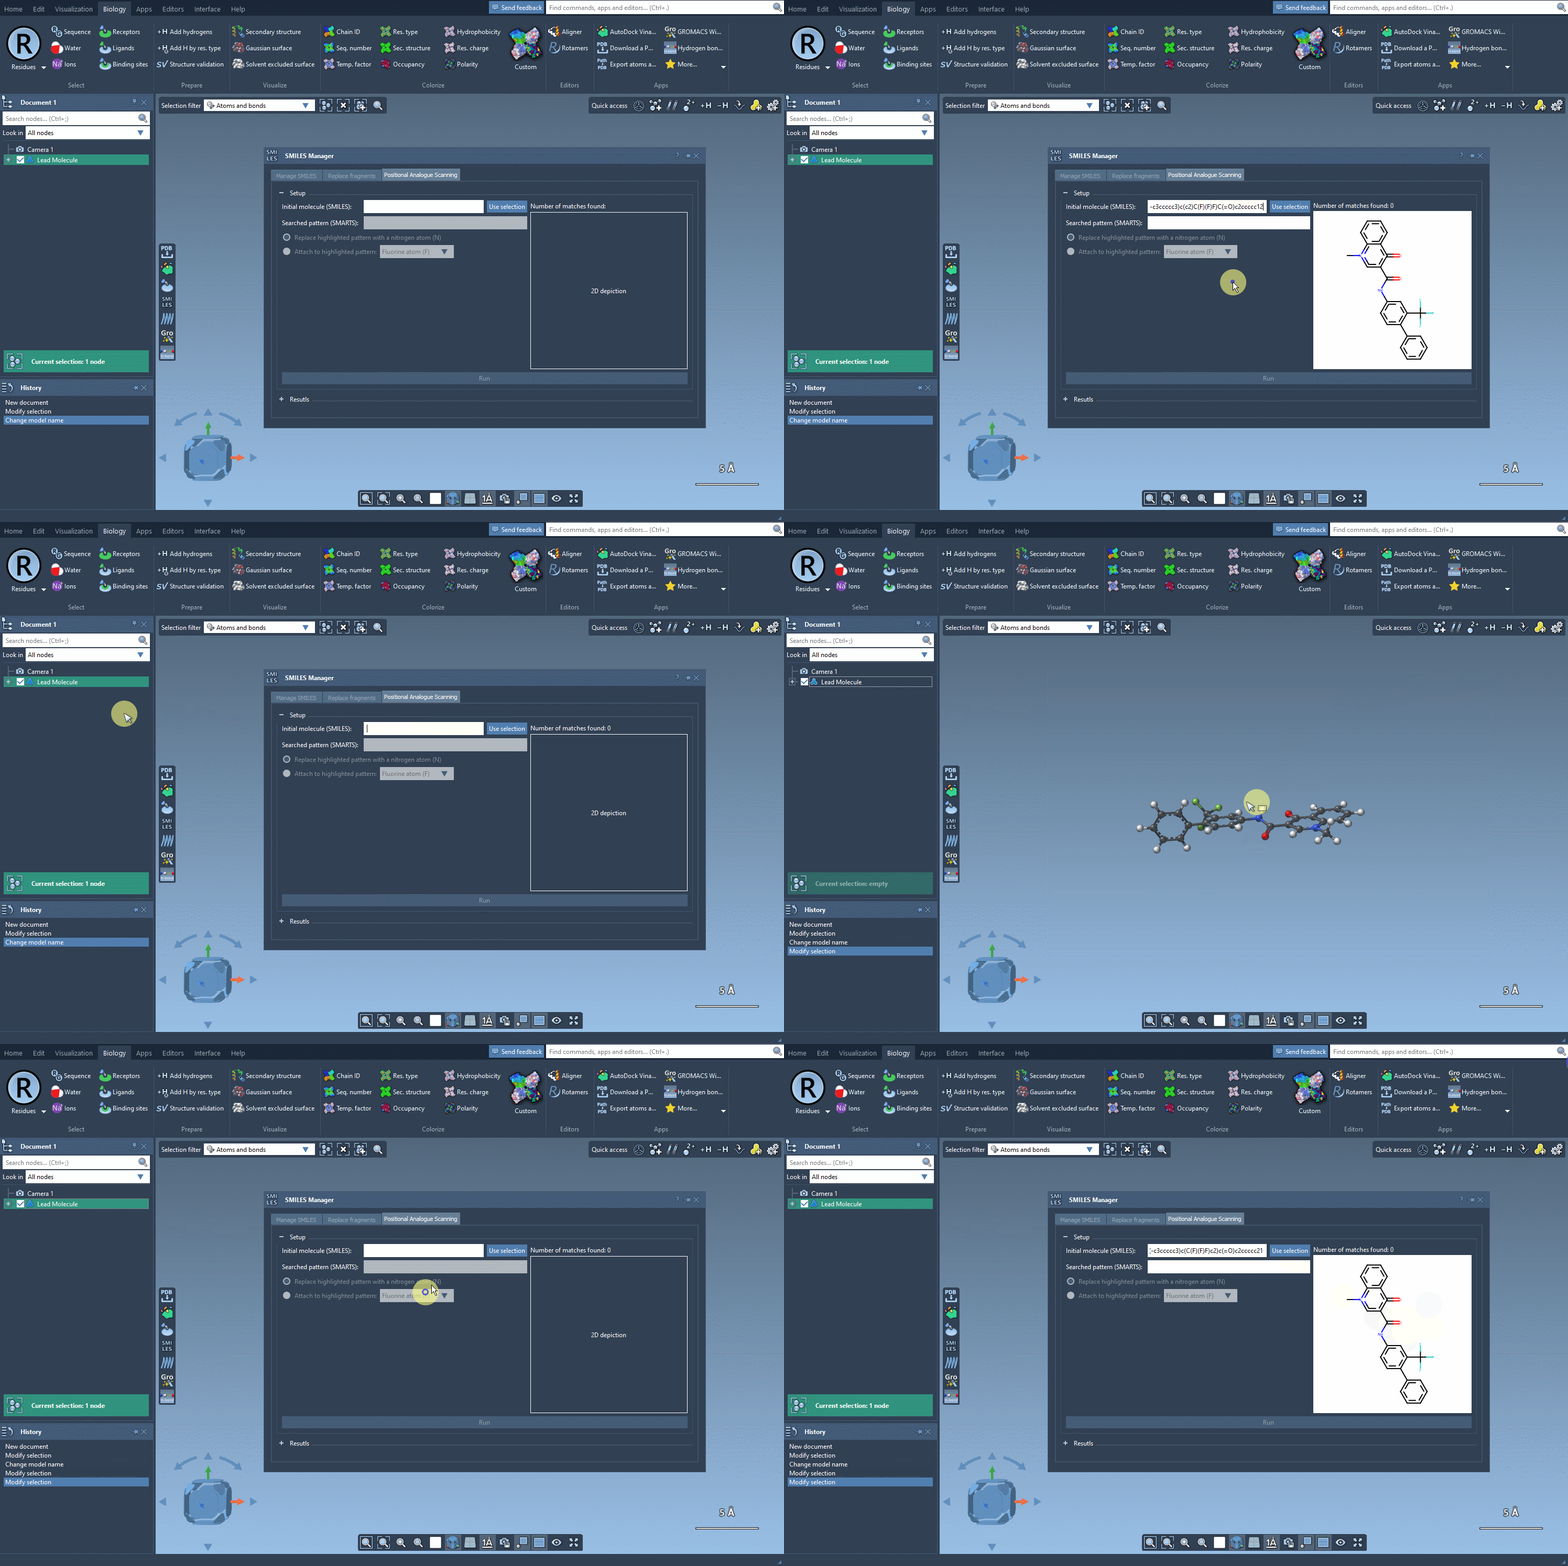
Provide the starting structure either by entering its SMILES string or by selecting a molecule already present in the SAMSON document and clicking Use selection. The tutorial demonstrates the workflow with this molecule:
CN1C=C(C(=O)Nc2ccc(-c3ccccc3)c(c2)C(F)(F)F)C(=O)c2ccccc12
Before generating analogues, take a moment to check that the intended starting structure is the one shown in the interface. A correct starting point makes the results easier to interpret, especially when several related structures are already open in a document.
Use SMARTS to define the scan
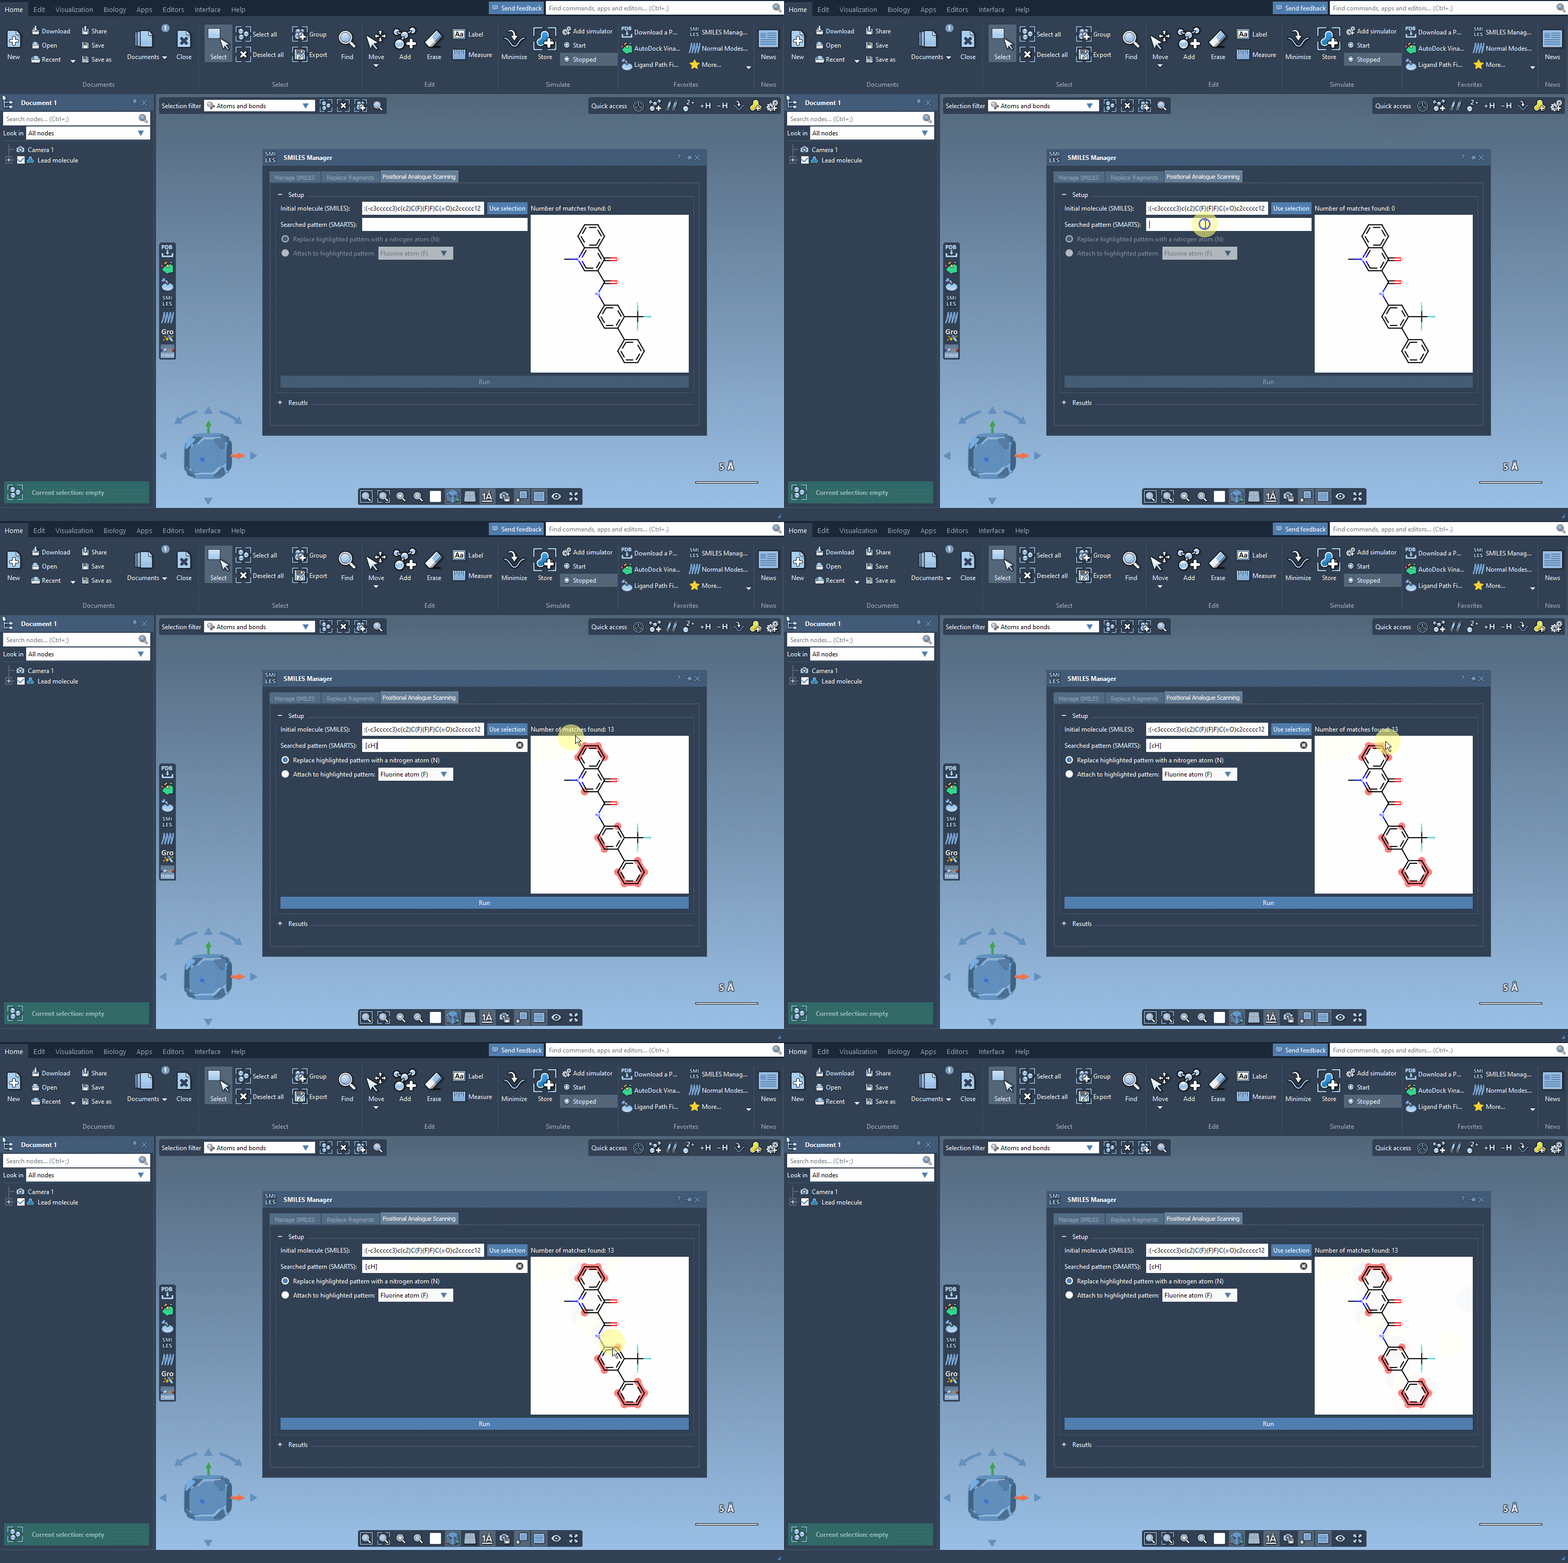
A SMARTS pattern tells the tool which parts of the starting structure to find. In the example, [cH] is used to match aromatic carbon atoms that have a hydrogen. The interface highlights the matches, letting you check whether the pattern is identifying the positions you intend to explore before you run the scan.
This check is important: a pattern that matches more positions than expected can produce a larger or different analogue series than you had in mind. Conversely, a pattern that is too specific may miss sites you wanted to include. Look at the highlighted atoms and adjust the SMARTS pattern if necessary.
Choose one kind of change at a time
Once the matches look right, choose whether to replace the matched pattern or attach a new atom or group to it. The tutorial’s example replaces the matched position with nitrogen. It also describes attachment examples using fluorine or a methyl group. After choosing the operation and group, click Run to generate the analogues and display them in the results table.
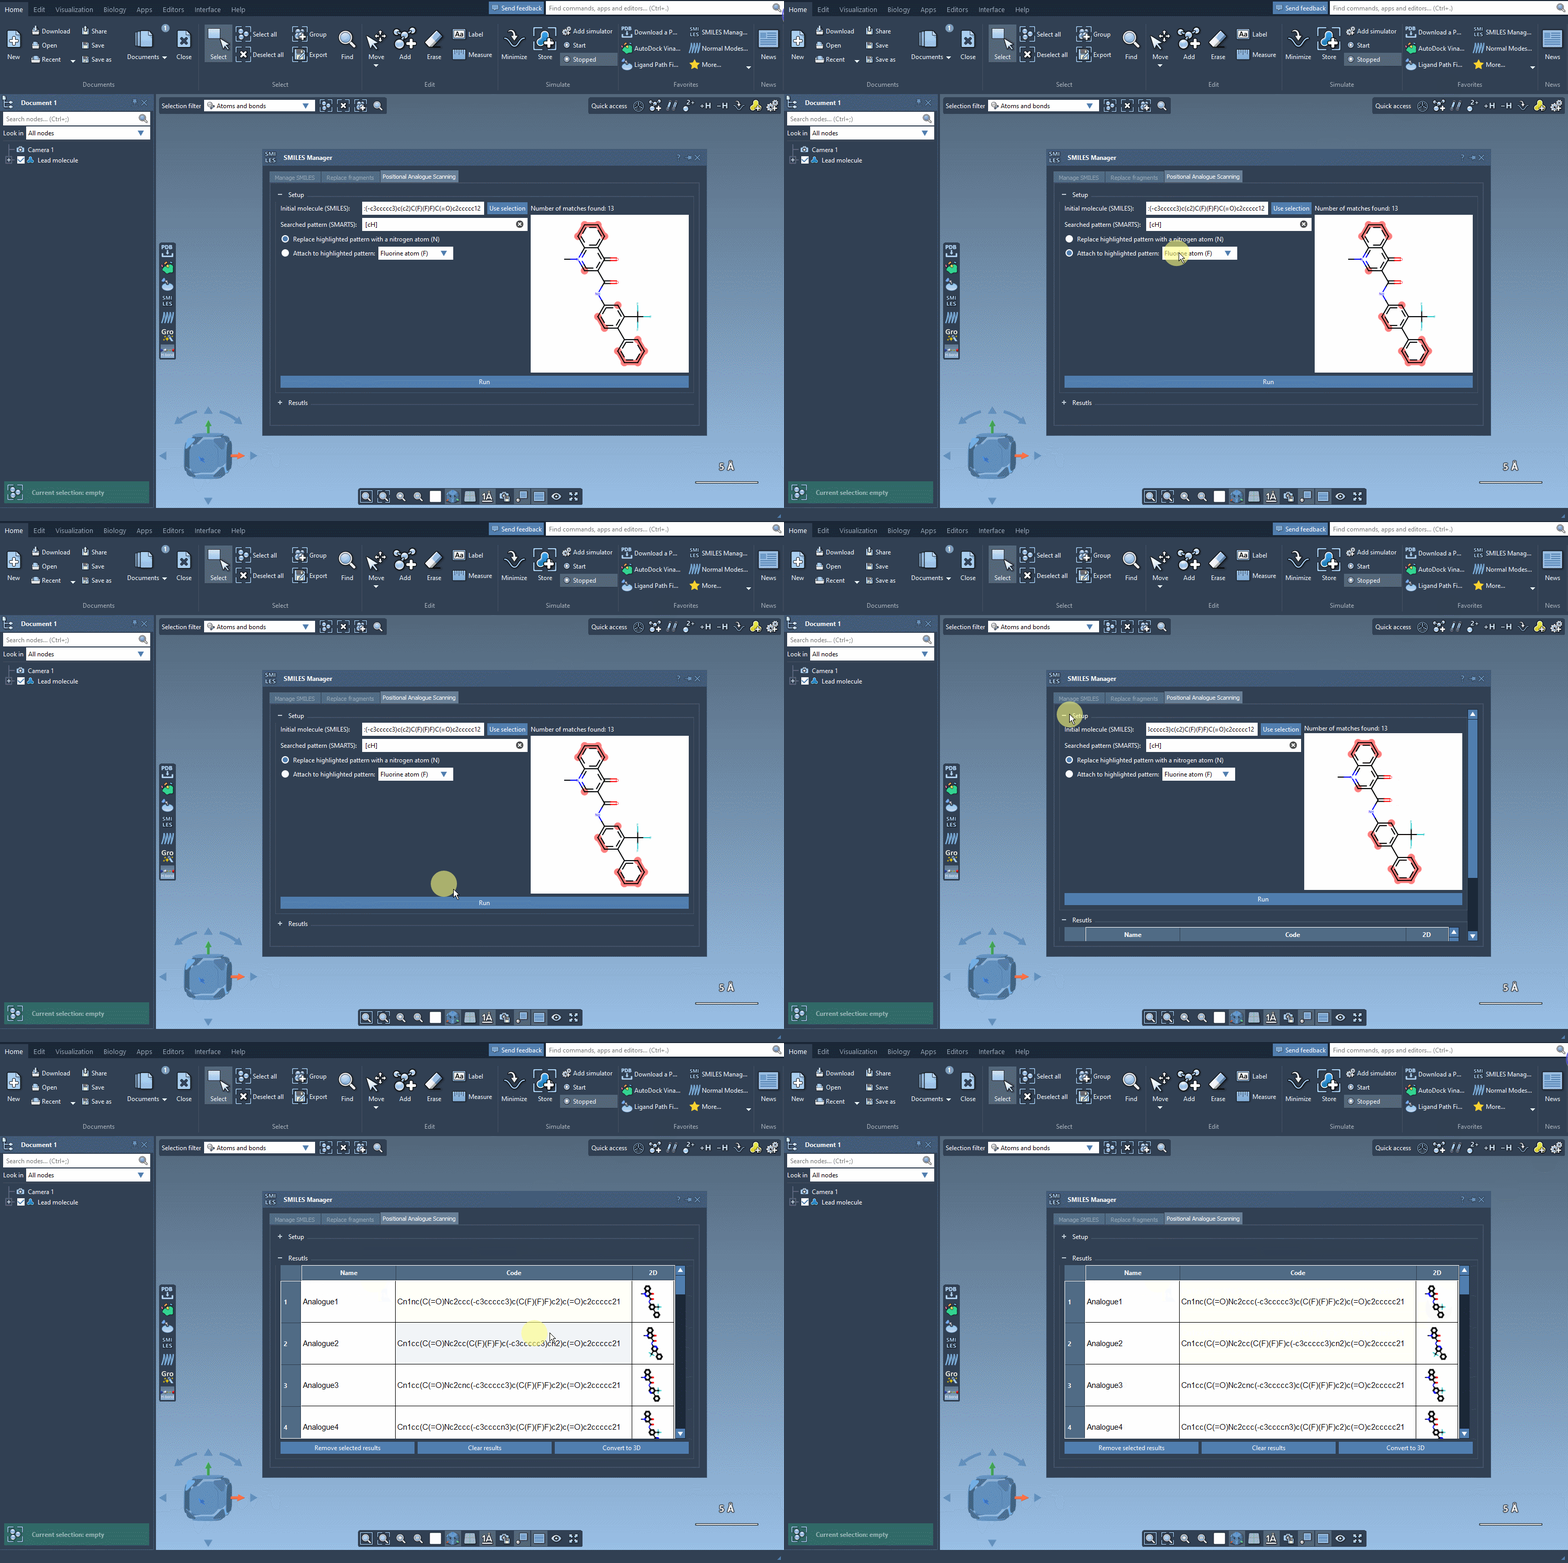
Thinking of the output as a position-by-position comparison can help keep the experiment interpretable. For example, if you are exploring a substituent, first generate a series with that same substituent at the different matched positions. You can then compare those structures as a group. This is a practical way to organize a design question; the generated structures themselves do not tell you which candidate will perform best.
Inspect the series before moving on
The results table lets you edit an analogue’s name or SMILES by double-clicking the corresponding cell. You can open a larger 2D depiction by double-clicking its image, or right-click the image and choose Open. Click the table’s 2D header cell to hide or show the depictions. These small controls are useful when you want to review structures closely or make the table easier to scan.
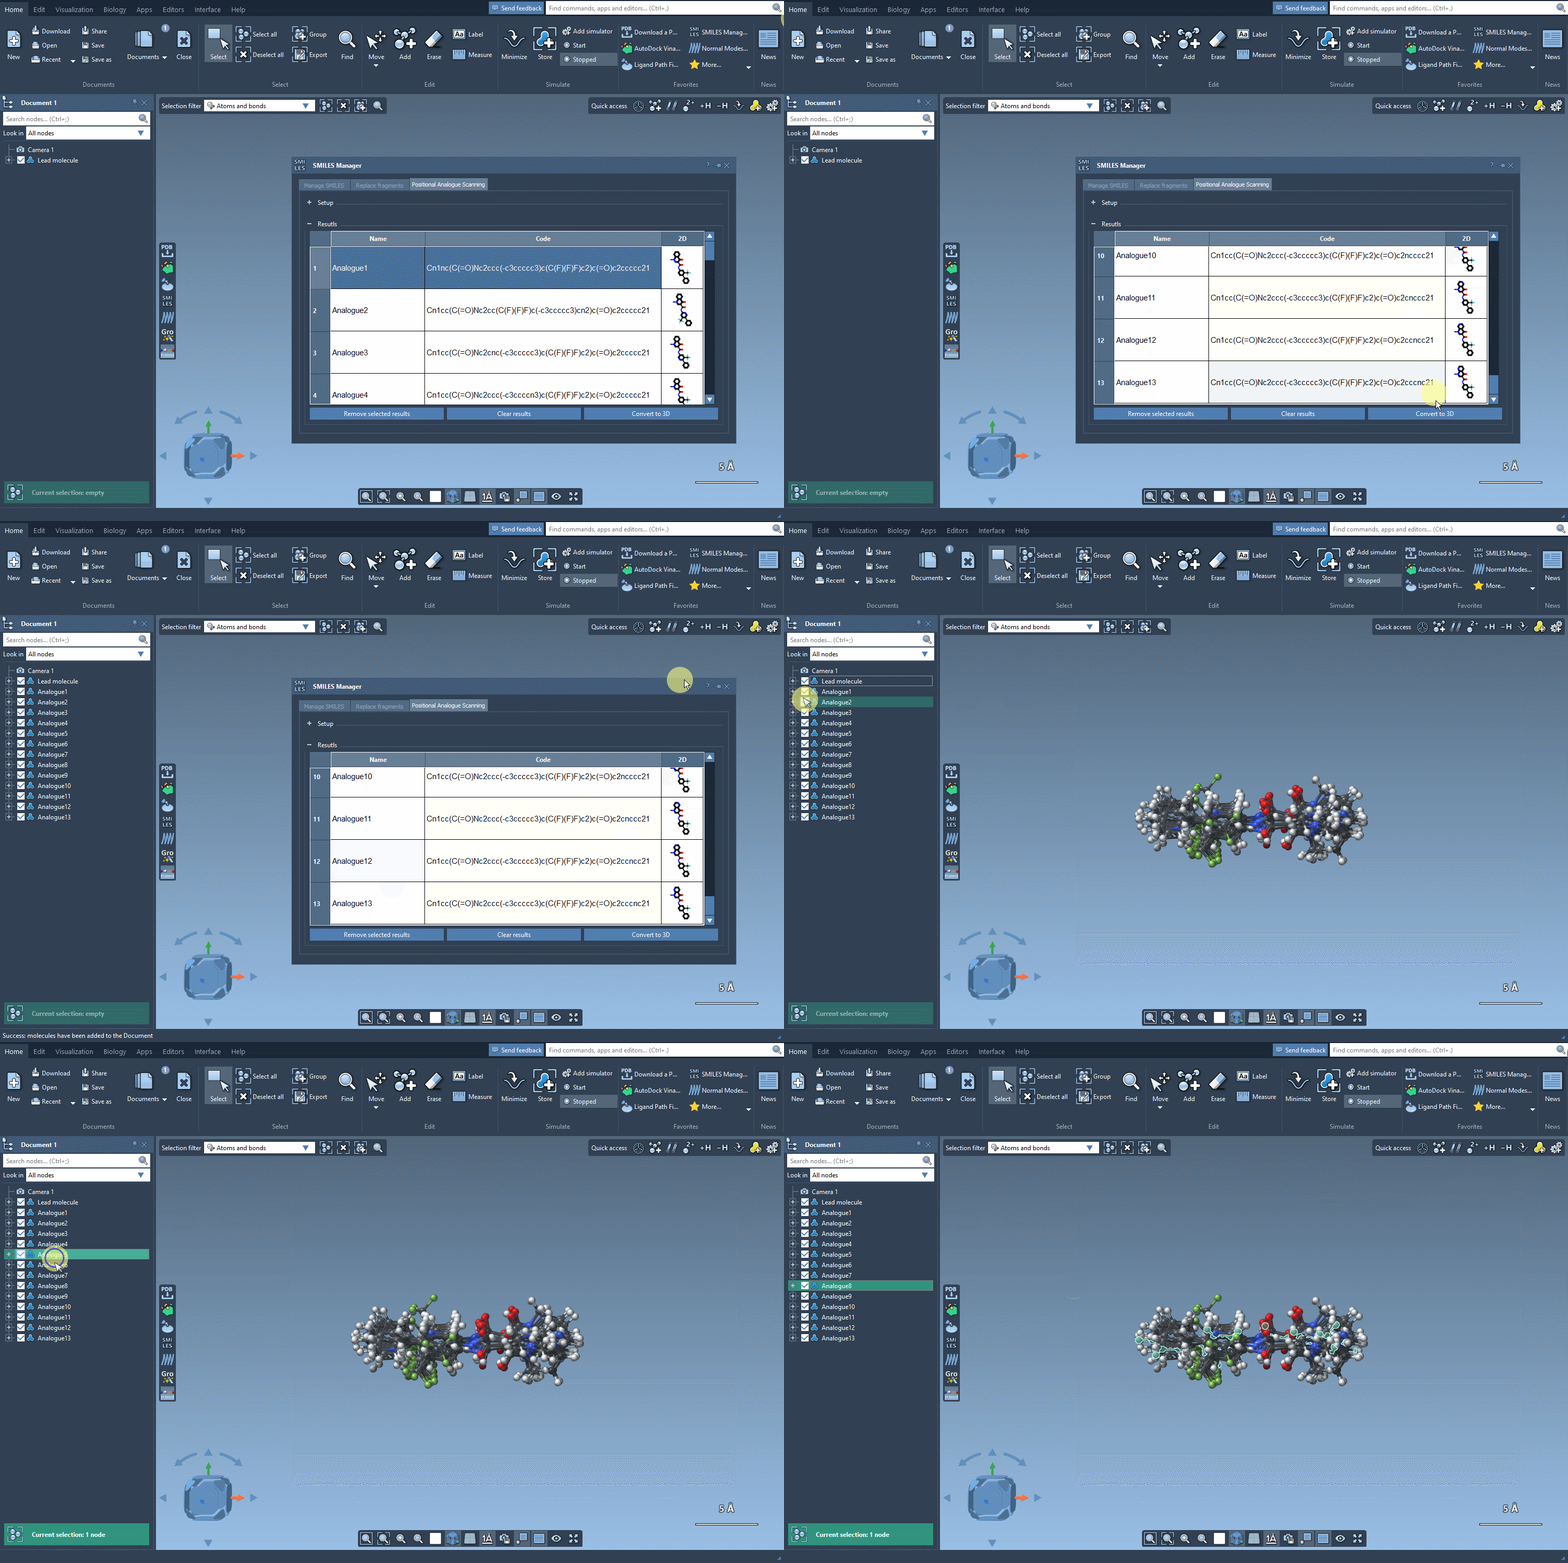
You can also remove selected rows or clear the whole results table. If you want to examine a particular candidate in three dimensions, right-click its depiction and choose the option to generate a 3D structure. Alternatively, use Convert to 3D to generate 3D structures for the generated analogues.
Use generated analogues as candidates, not conclusions
Positional scanning is a way to create and organize structural variants, not a substitute for evaluating them. Once you have 3D structures, you can continue with the analysis that fits your project. For example, the documentation describes docking with the AutoDock Vina Extended extension, then examining whether changes preserve key interactions with a target protein or introduce new ones. You can also use the related Strain Explorer tutorial for ligand-strain analysis.
The main benefit of this workflow is a more systematic first step: define what you want to change, confirm where the pattern matches, generate the series, and then inspect and analyze the candidates. For the full interface walkthrough, learn more in the original documentation.
Note: SAMSON and all SAMSON Extensions are free for non-commercial use. Get SAMSON.