



When a promising ligand has several similar positions, exploring each one by hand can become tedious. You have to edit structures repeatedly, keep track of which change was made where, and then prepare the candidates for comparison. Positional analogue scanning offers a more systematic first step: define a molecular pattern, choose a change, and generate a series of analogues in one workflow.
In SAMSON, the SMILES Manager can scan a starting molecule for a SMARTS pattern and replace or attach an atom or group at the matching positions. The result is a set of candidate structures that you can inspect before deciding which ones are worth taking into 3D modeling or docking.
Start with a molecule and a question
Before generating anything, decide what you want to learn. Are you testing whether an aromatic carbon can be replaced by nitrogen, or whether adding a small substituent at a particular position could be useful? A clear question makes the resulting series easier to interpret: each analogue represents a defined structural change rather than an arbitrary edit.
You can provide the starting molecule by entering its SMILES code, or select a molecule already present in the SAMSON document and use the Use selection button.
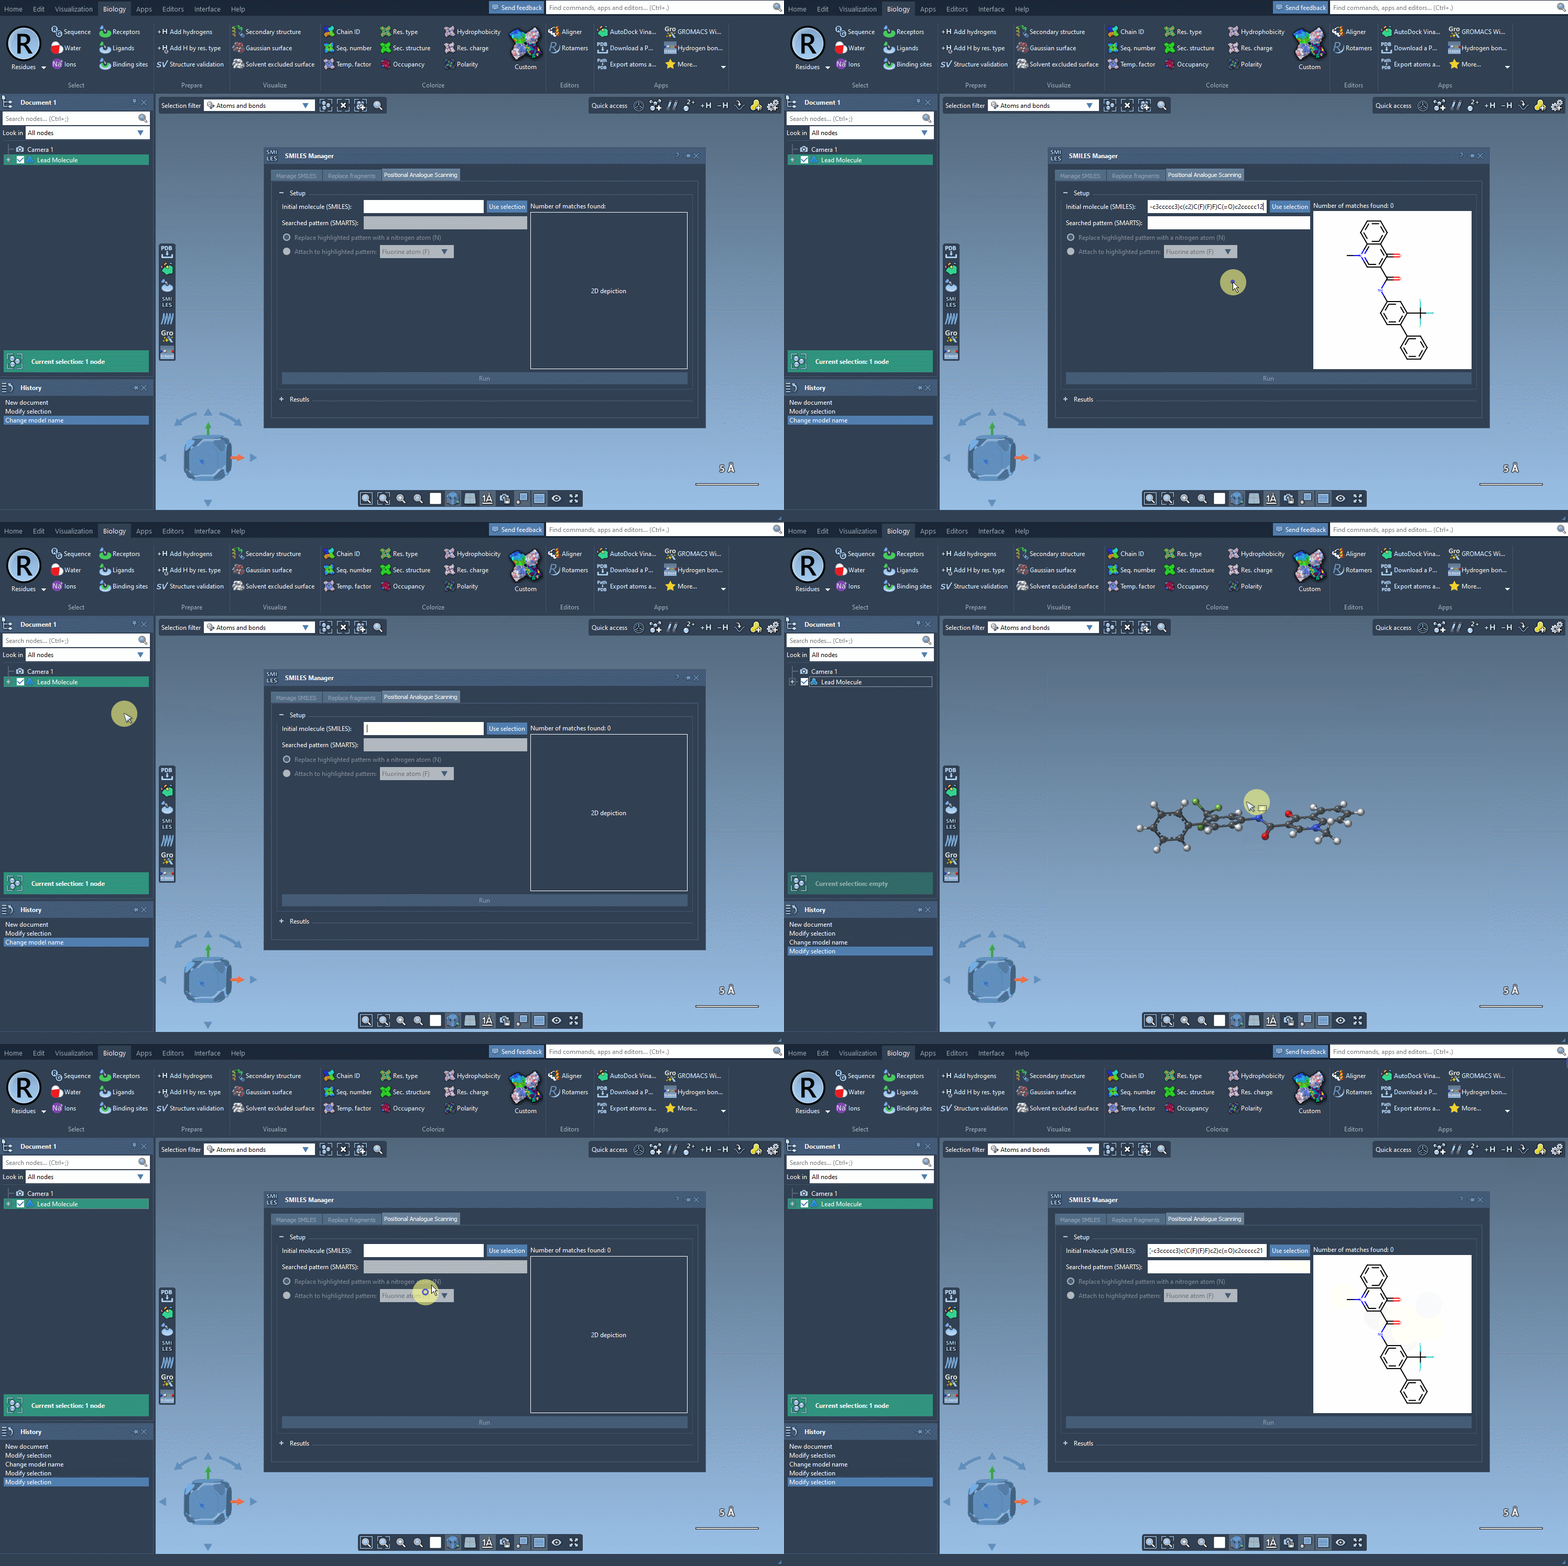
The tutorial uses this example molecule: CN1C=C(C(=O)Nc2ccc(-c3ccccc3)c(c2)C(F)(F)F)C(=O)c2ccccc12. You do not need to use this specific structure; the key is to begin with a molecule that you want to explore.
Use SMARTS to define the positions
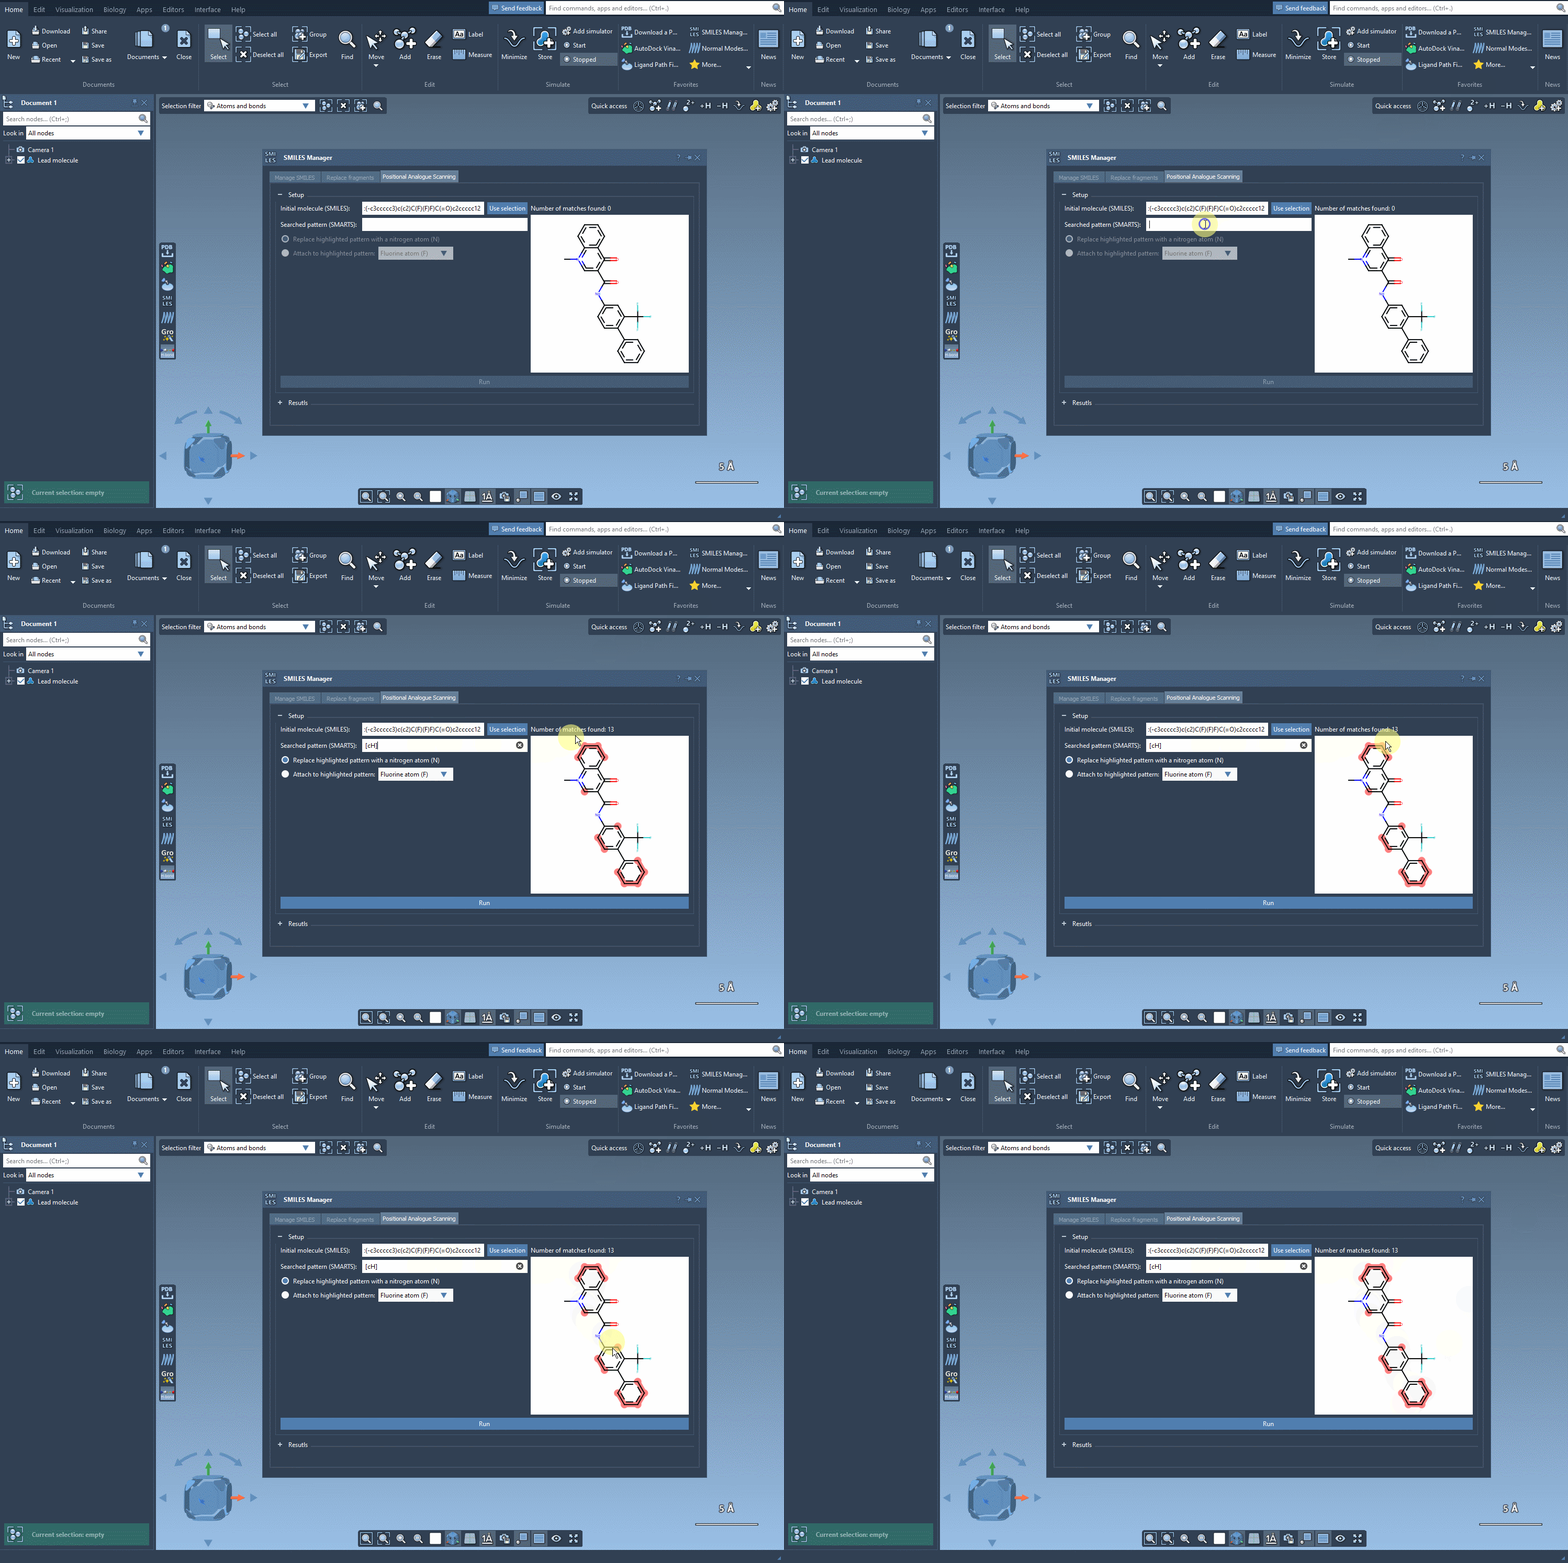
Next, enter a SMARTS pattern describing the part of the molecule to scan. In the example, [cH] identifies aromatic carbon atoms that have a hydrogen. The interface highlights the matches it finds in the starting structure, making it possible to check whether the pattern selects the positions you intended before generating analogues.
This check matters. A pattern that matches several sites will create a series across those sites, so inspect the highlighted atoms and make sure the selection fits your design question. If the matches are not what you expected, revise the pattern before running the scan.
Choose a simple edit, then inspect the series
Once the matches look right, choose whether to replace the matched pattern or attach a group to it. In the tutorial, the replacement option is used to substitute nitrogen for the selected aromatic carbon. The attachment examples include fluorine and a methyl group. Click Run to generate the analogues and display their SMILES codes and 2D depictions in the results table.
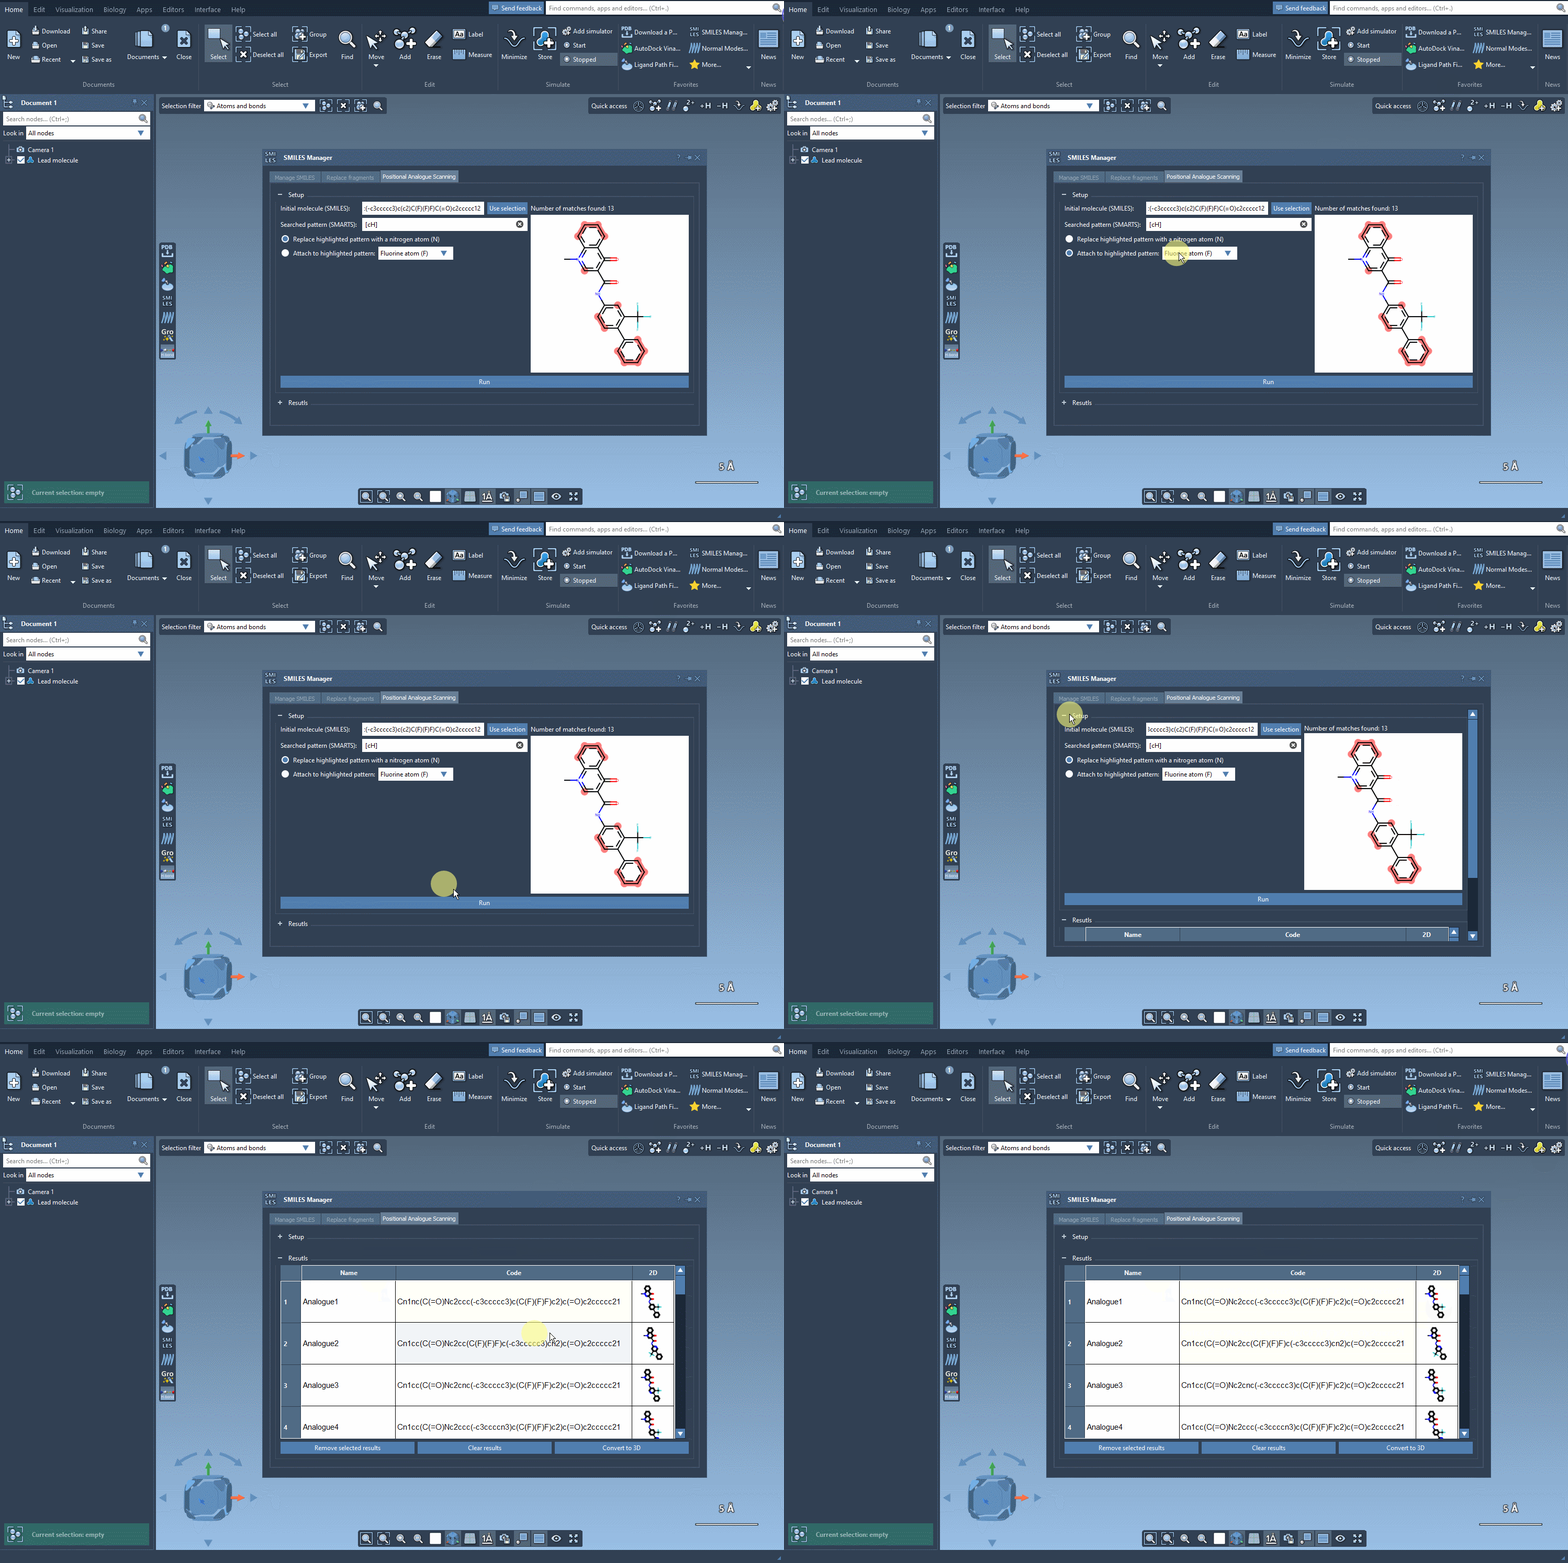
Think of this output as a manageable set of hypotheses, not a ranking of which molecule is best. The scan helps you explore structural alternatives; it does not, by itself, establish whether an analogue will bind better or retain the interactions you care about. Reviewing the structures first helps catch candidates that are unsuitable for your next step.
Keep useful candidates moving
The results table lets you edit an analogue’s name or SMILES by double-clicking the relevant cell. Double-click a 2D depiction to open it larger, or right-click it to access options such as generating a 3D structure for that analogue. You can also hide or show the 2D images from the table header, remove selected rows, or clear the results.
When you are ready to continue, use Convert to 3D to generate 3D structures for the analogues. From there, you can study them in the context of your project—for example, dock candidates with the AutoDock Vina Extended extension and examine whether changes preserve key interactions or introduce new ones. Docking and interaction analysis can help prioritize what to investigate, but they should be interpreted as part of your broader modeling workflow.
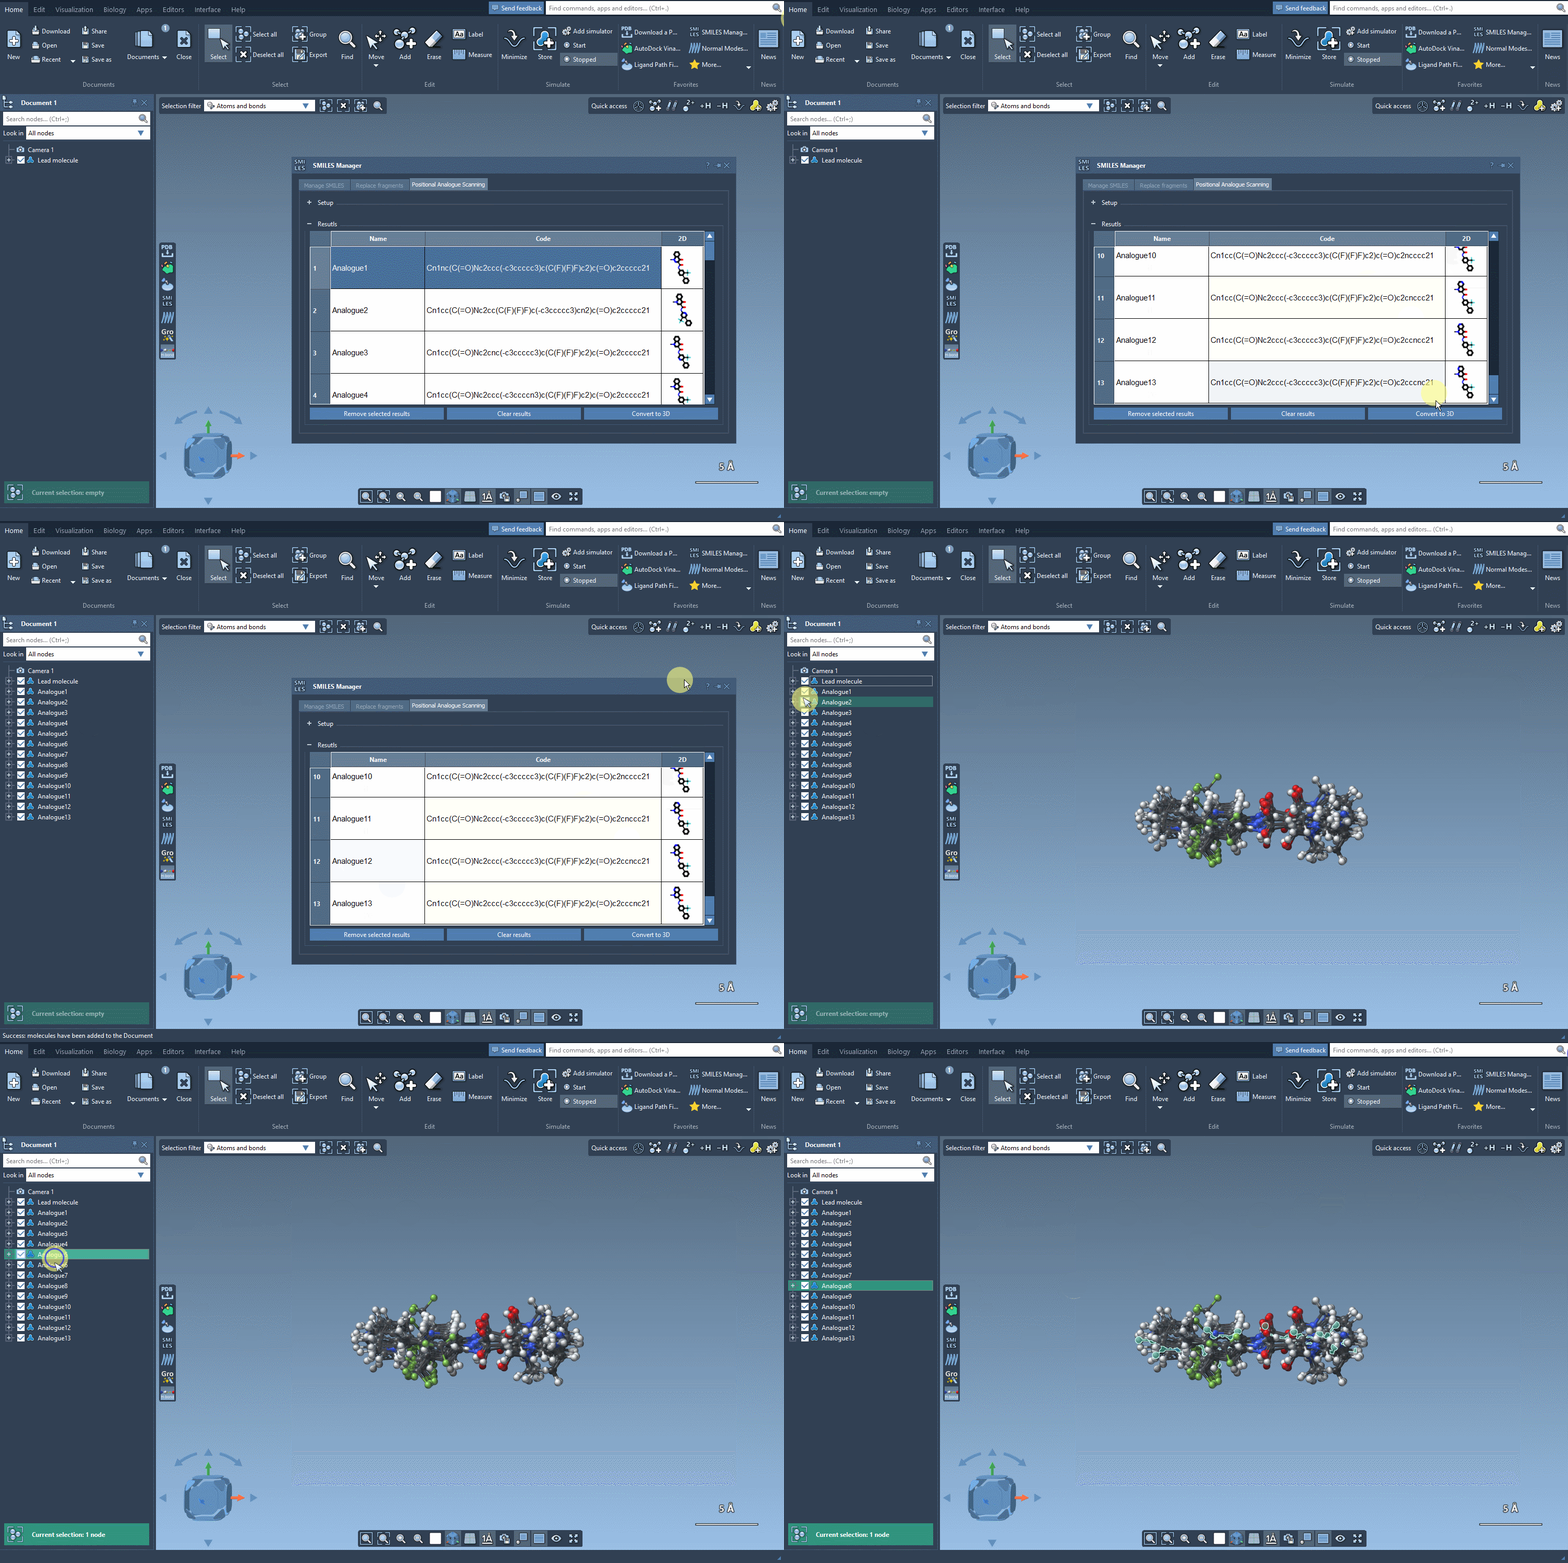
A practical habit is to preserve the link between each candidate and the edit that produced it. Use meaningful names in the results table, and keep the scan question in mind when comparing structures. That makes it easier to explain why a candidate was generated and what you want to learn from its subsequent analysis.
For the full workflow and interface details, read the positional analogue scanning tutorial.
Note: SAMSON and all SAMSON Extensions are free for non-commercial use. Get SAMSON.