In large protein assemblies, symmetry often plays a fundamental role in biological function and modeling workflows. However, when working with complex structures like viral capsids or multimeric proteins, automated symmetry detection tools may propose multiple symmetry groups. This can lead to a common pain point for molecular modelers: which symmetry axis should I pick?
The Symmetry Detection extension in SAMSON provides a powerful interface for exploring and choosing among potential symmetries. In this post, we’ll walk through practical strategies to determine the most relevant symmetry group and axis when facing multiple detection results.
Why Multiple Symmetry Groups Appear
Large assemblies may exhibit approximate symmetries at different hierarchical levels. The Symmetry Detection extension automatically analyzes the structure and suggests all plausible symmetry groups based on spatial arrangements and RMSD values (Root Mean Square Deviation).
This is helpful, but it can leave users wondering which suggestion to prioritize.
Best Practices for Choosing a Symmetry Group
- Prefer higher-order symmetries if RMSD values remain low. These typically provide more structural insight and modeling efficiency.
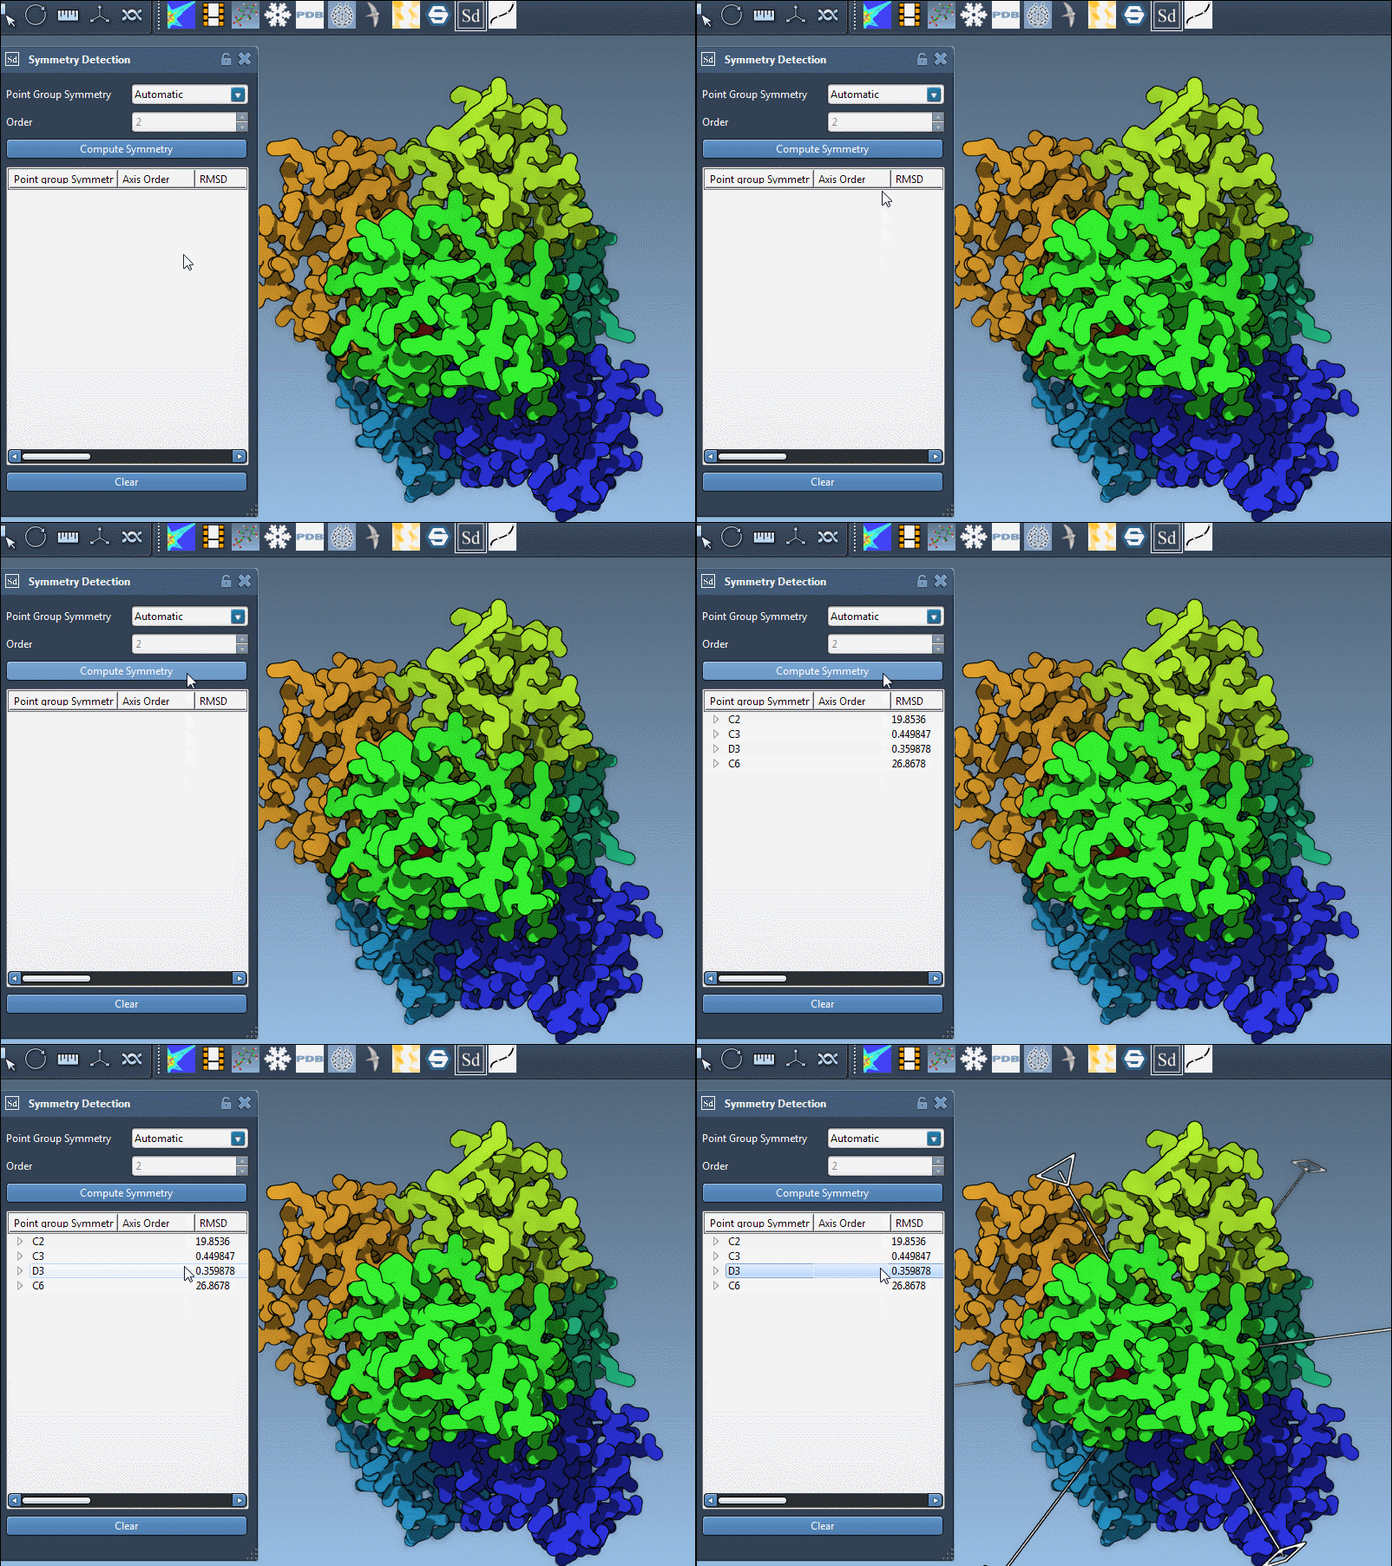
- Use visual previews. Click on a symmetry group in the UI to instantly visualize the primary axis in the viewport. This helps you interpret the kind of symmetry being proposed.
- Compare RMSDs. Lower RMSD values signal a better fit between repeated units and the symmetry model. This quantitative score can guide your choice.
Example: 1B4B with Dihedral Symmetry
The example of the trimeric assembly 1B4B illustrates this well. The extension proposes a D3 (dihedral of order 3) symmetry with a low RMSD. Here’s how the axis selection interface appears after detection:

You can interact with the visualization to highlight specific axes. Single-click highlights the selected axis in bold, and double-click aligns the camera for a better perspective down that axis.
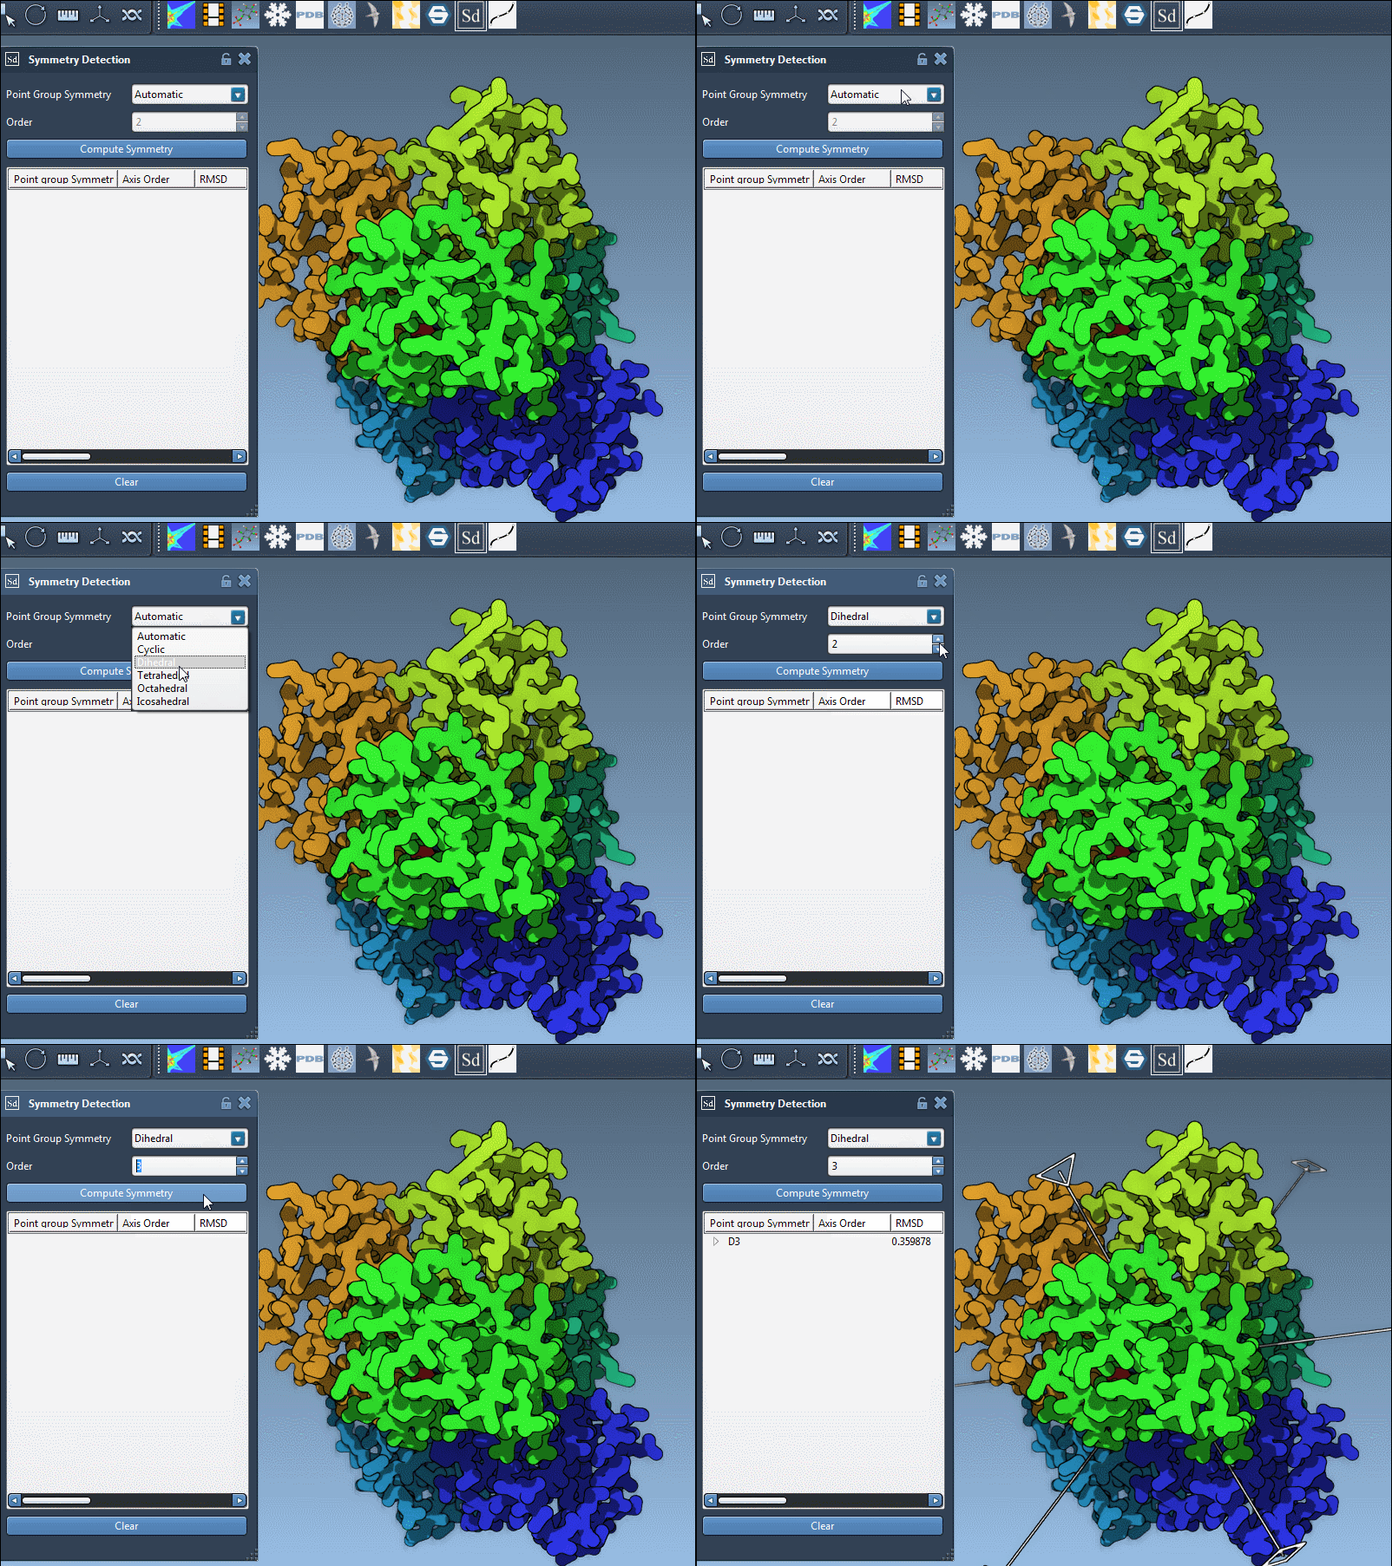
Specifying a Known Symmetry Group
If you already know the expected symmetry (from literature or experimental design), you can also override the automatic detection. Simply pick the desired group and its order from the dropdown menu in the extension interface:

This is particularly useful if you want to validate a known structural hypothesis against actual symmetry in the assembly model.
Looking Closer: Exploring Axes and Their RMSDs
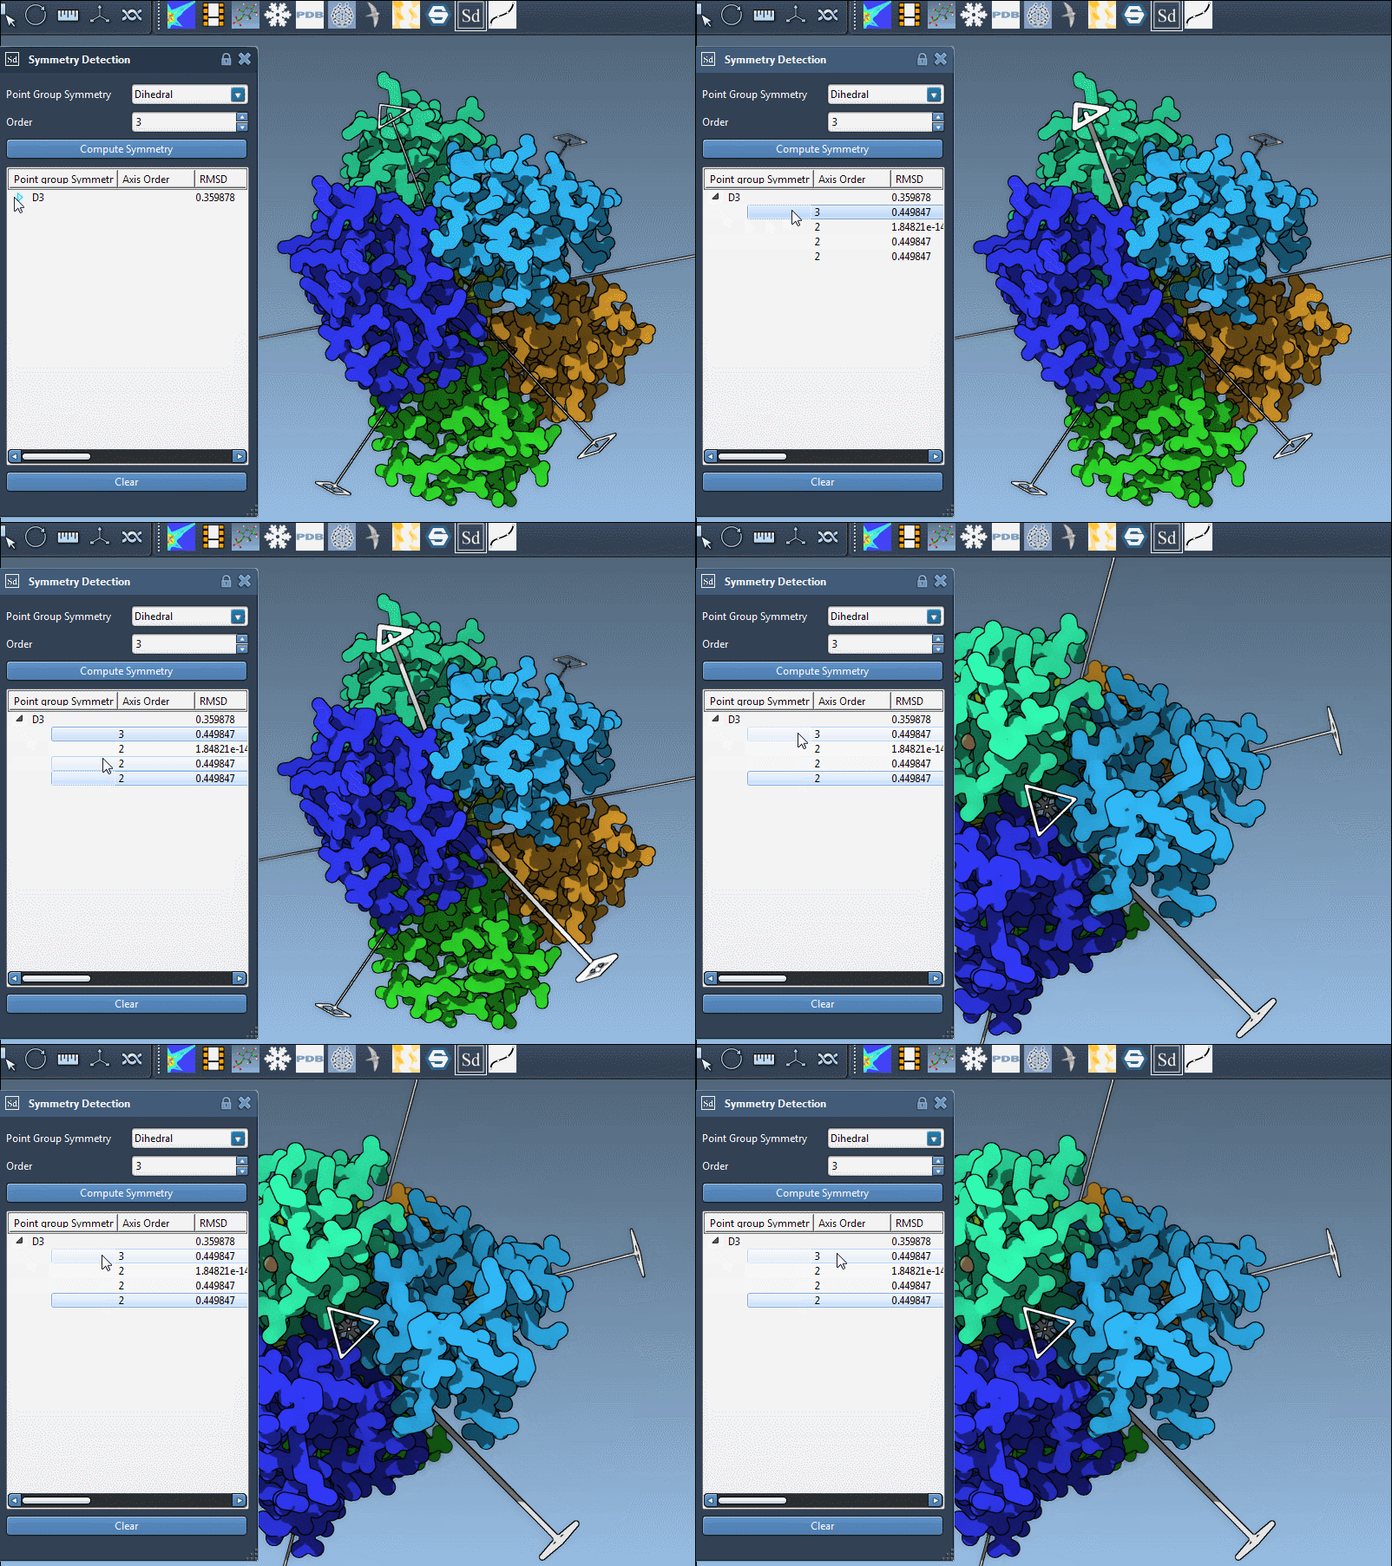
Each symmetry group may contain several individual axes. Expand the group listing to display the full set, along with RMSD values calculated for each. These values indicate how well the structure aligns with the symmetry operation associated with that axis.
- Use
single-clickto preview an axis in the viewport. - Use
double-clickto reorient your view along the axis.

When to Choose Manually
There may be cases where automatic detection doesn’t propose the symmetry you expect. In such situations, manual selection becomes essential for consistency across projects or to meet publication standards. Knowing how to specify axes manually ensures you have full control over the symmetry modeling process.
Conclusion
Discerning the right symmetry axis for large biological assemblies doesn’t have to be guesswork. With SAMSON’s Symmetry Detection extension, you can interactively evaluate and compare multiple options using both visual and quantitative feedback tools. This workflow not only helps validate structural hypotheses but also streamlines simulations by focusing on the asymmetric unit of interest.
To learn more about the symmetry detection capabilities in SAMSON, visit the full documentation here: https://documentation.samson-connect.net/tutorials/symmetry/computing-axes-of-symmetry-of-biological-assemblies/
SAMSON and all SAMSON Extensions are free for non-commercial use. You can download the platform at https://www.samson-connect.net.


