



When a protein or other molecular structure fills the viewport, the front layers can hide the residues you want to inspect. Zooming closer may help, but it can also make it harder to understand where the feature sits in the whole structure. Progressive clipping offers another approach: adjust how much of the scene is visible along the camera’s depth, so you can inspect an interior region while keeping a useful sense of context.
Unlike a traditional sharp cutoff, progressive clipping fades structures gradually according to their distance from the camera. SAMSON combines clipping in front of the camera target with fog behind it, creating a visible region—or “viewing slab”—that you can adjust as you explore. Progressive clipping is activated by default.
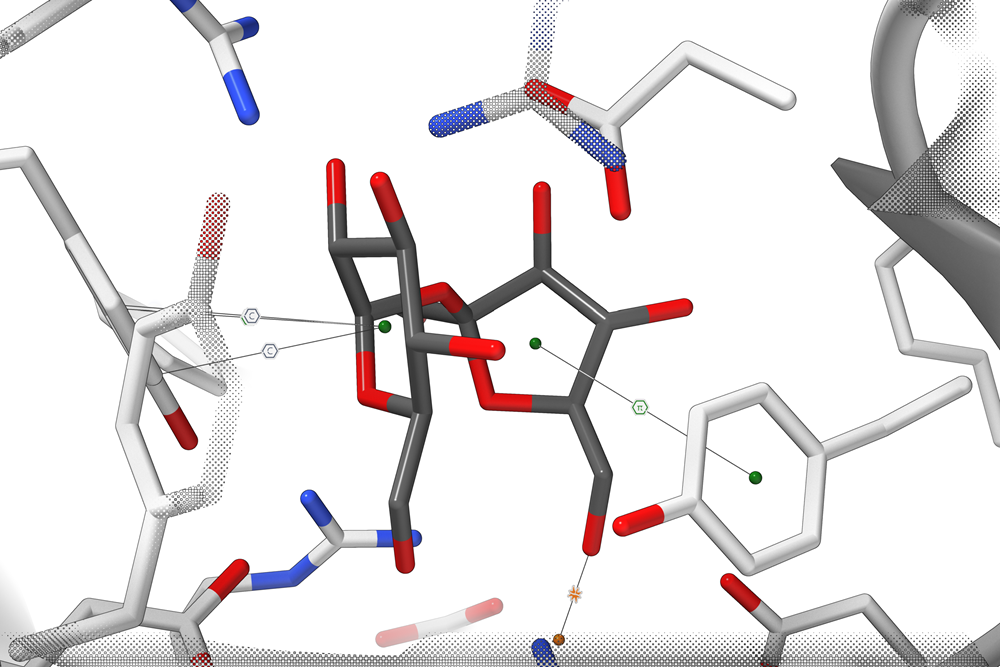
A practical way to inspect a crowded region
Start by loading a structure, for example with Home > Fetch. Rotate and zoom until the area of interest is in view. If the structure’s outer layers obscure that area, adjust the clipping distance rather than repeatedly changing the camera angle.
- Change the clipping distance: hold Ctrl on Windows or Linux, or Cmd on macOS, while scrolling or sliding on a trackpad.
- Change the visible region’s thickness: hold Shift+Ctrl on Windows or Linux, or Shift+Cmd on macOS, while scrolling.
The first adjustment moves the clipping distance; the second changes the thickness of the viewing slab, governed by clipping and fog. Try making small adjustments and pause between them. That makes it easier to tell whether a feature is disappearing because it has moved outside the visible region or because the camera has moved.
Use the viewport controls when you want more precision
For a more deliberate adjustment, open the clipping control panel using the clipping and fog control icon at the bottom of the viewport. The panel shows the Camera Eye (your current viewing position), the Camera Target (what you are looking at), and the background, which represents infinite depth.
Use the controls on the left to adjust clipping distance and those on the right to adjust fog distance. In practical terms, clipping helps manage what begins to be cut away close to the camera, while fog hides parts farther into the background. The eye and target readouts can help you make sense of these controls as you adjust the view.
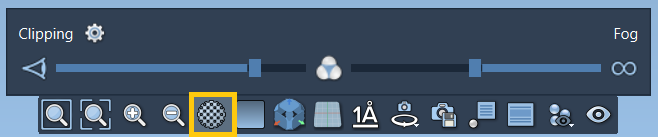
Choose the look that suits the task
If the gradual transition is not appropriate for the image or inspection you are doing, open clipping preferences from the panel’s Settings icon, or go to Interface > Preferences > Rendering > Clipping. The available presets include progressive and traditional sharp-cut clipping. You can also change the border size to adjust the thickness of the clipping edge.
Progressive clipping is particularly useful when exploring internal binding sites or ligand environments, preparing images where depth clarity matters, and demonstrating molecular features interactively. It can also be combined with visualization choices such as silhouettes, visual presets, and colorization. If you select nearby residues—for example, through Select > Biology > Binding sites—labels can help make the region easier to interpret.
A simple habit can make the process less frustrating: first orient the camera, then adjust clipping distance, and finally tune the slab thickness. If the view becomes confusing, use the viewport controls to refine clipping and fog rather than starting over. The controls remain available as you rotate and zoom.
For the full navigation guide, including editor controls, camera management, and clipping options, see the SAMSON “Moving around” documentation.
Note: SAMSON and all SAMSON Extensions are free for non-commercial use. Get SAMSON.